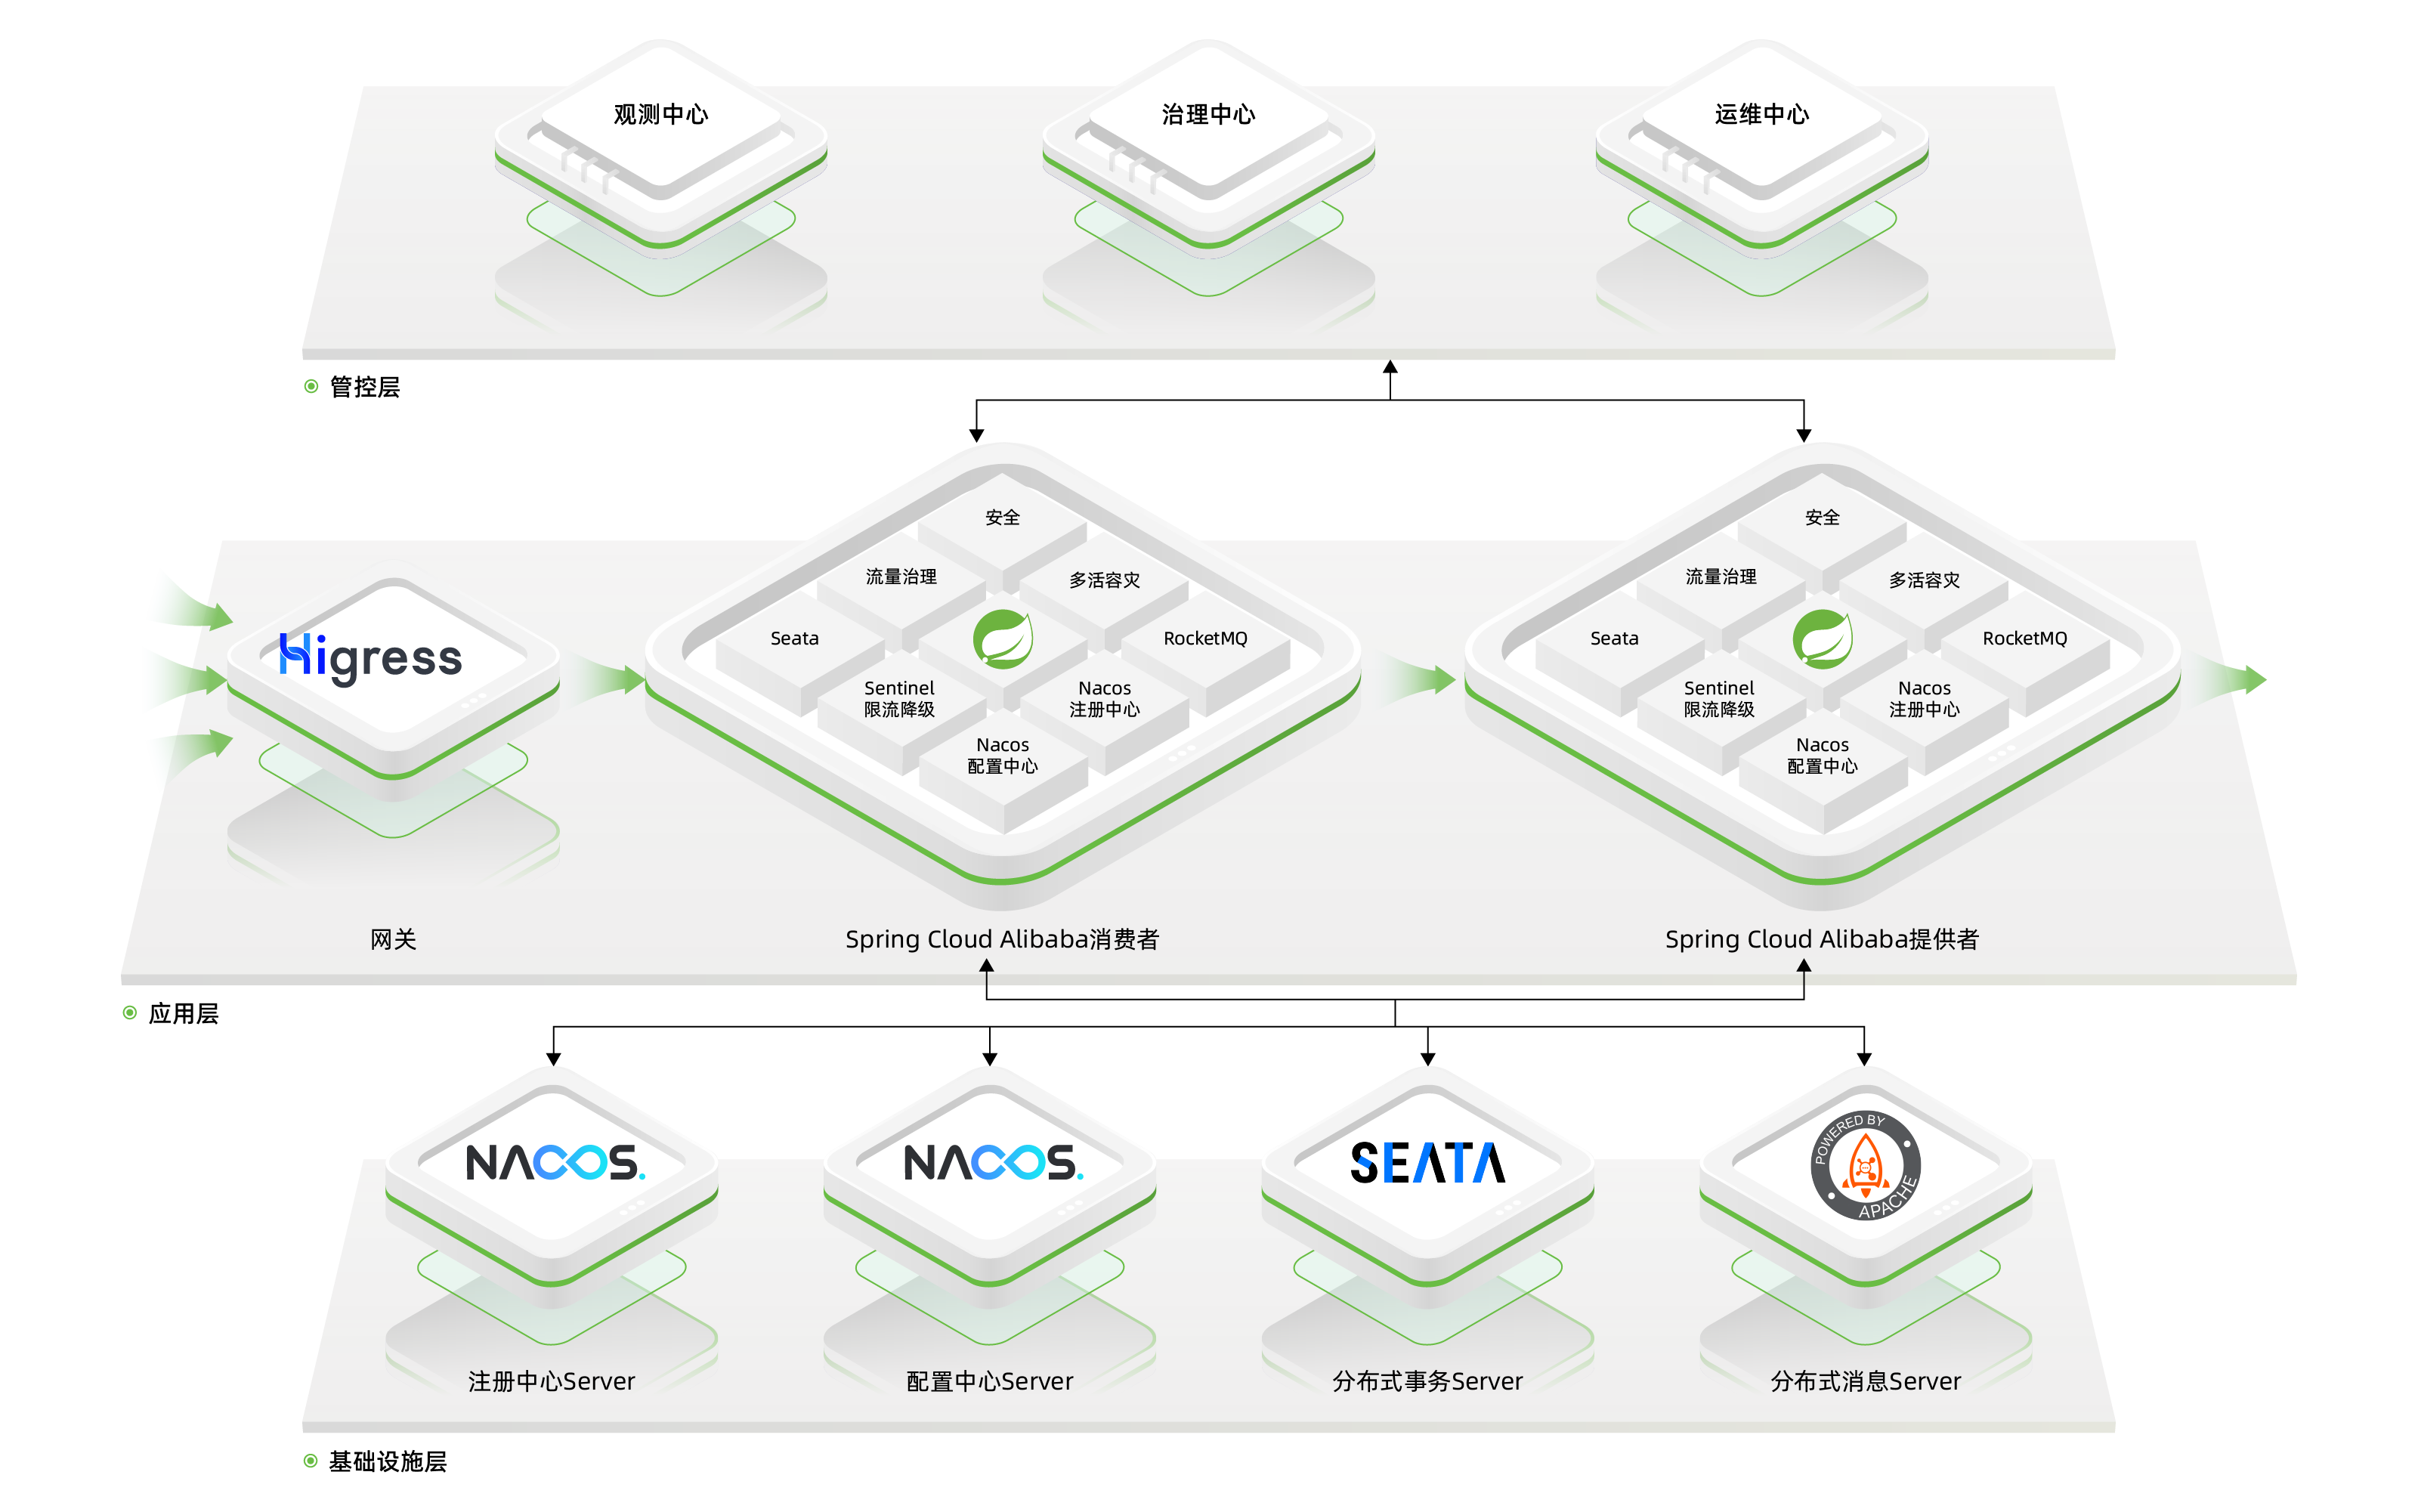
介绍
Spring Cloud Alibaba 官网:https://sca.aliyun.com/zh-cn/
Spring Cloud Alibaba 在 SpringCloud 中的介绍:https://spring.io/projects/spring-cloud-alibaba
Spring Cloud Alibaba 文档:https://spring-cloud-alibaba-group.github.io/github-pages/2022/zh-cn/index.html
案例代码
Nacos Discovery
https://nacos.io/zh-cn/docs/v2/quickstart/quick-start.html
安装 Nacos
从 https://github.com/alibaba/nacos/releases 下载最新稳定版,解压后启动即可。
wget https://github.com/alibaba/nacos/releases/download/2.2.3/nacos-server-2.2.3.zip
unzip nacos-server-2.2.3.zip
cd nacos
bash bin/startup.sh -m standalone
启动完成后可打开控制台 http://192.168.31.114:8848/nacos 。

服务注册
以 sca-service 为例,在项目的 build.gradle.kts 中添加 nacos-discovery 依赖。
implementation("com.alibaba.cloud:spring-cloud-starter-alibaba-nacos-discovery")
添加 Nacos Discovery 的基本配置。
spring:
  application:
    name: sca-service
  cloud:
    nacos:
      discovery:
        server-addr: 192.168.31.114
# -Dport=9000
server:
  port: ${port:9000}
在启动类上增加 @EnableDiscoveryClient 注解。
@EnableDiscoveryClient
@SpringBootApplication
public class ScaServiceApplication {
    public static void main(String[] args) {
        SpringApplication.run(ScaServiceApplication.class);
    }
}
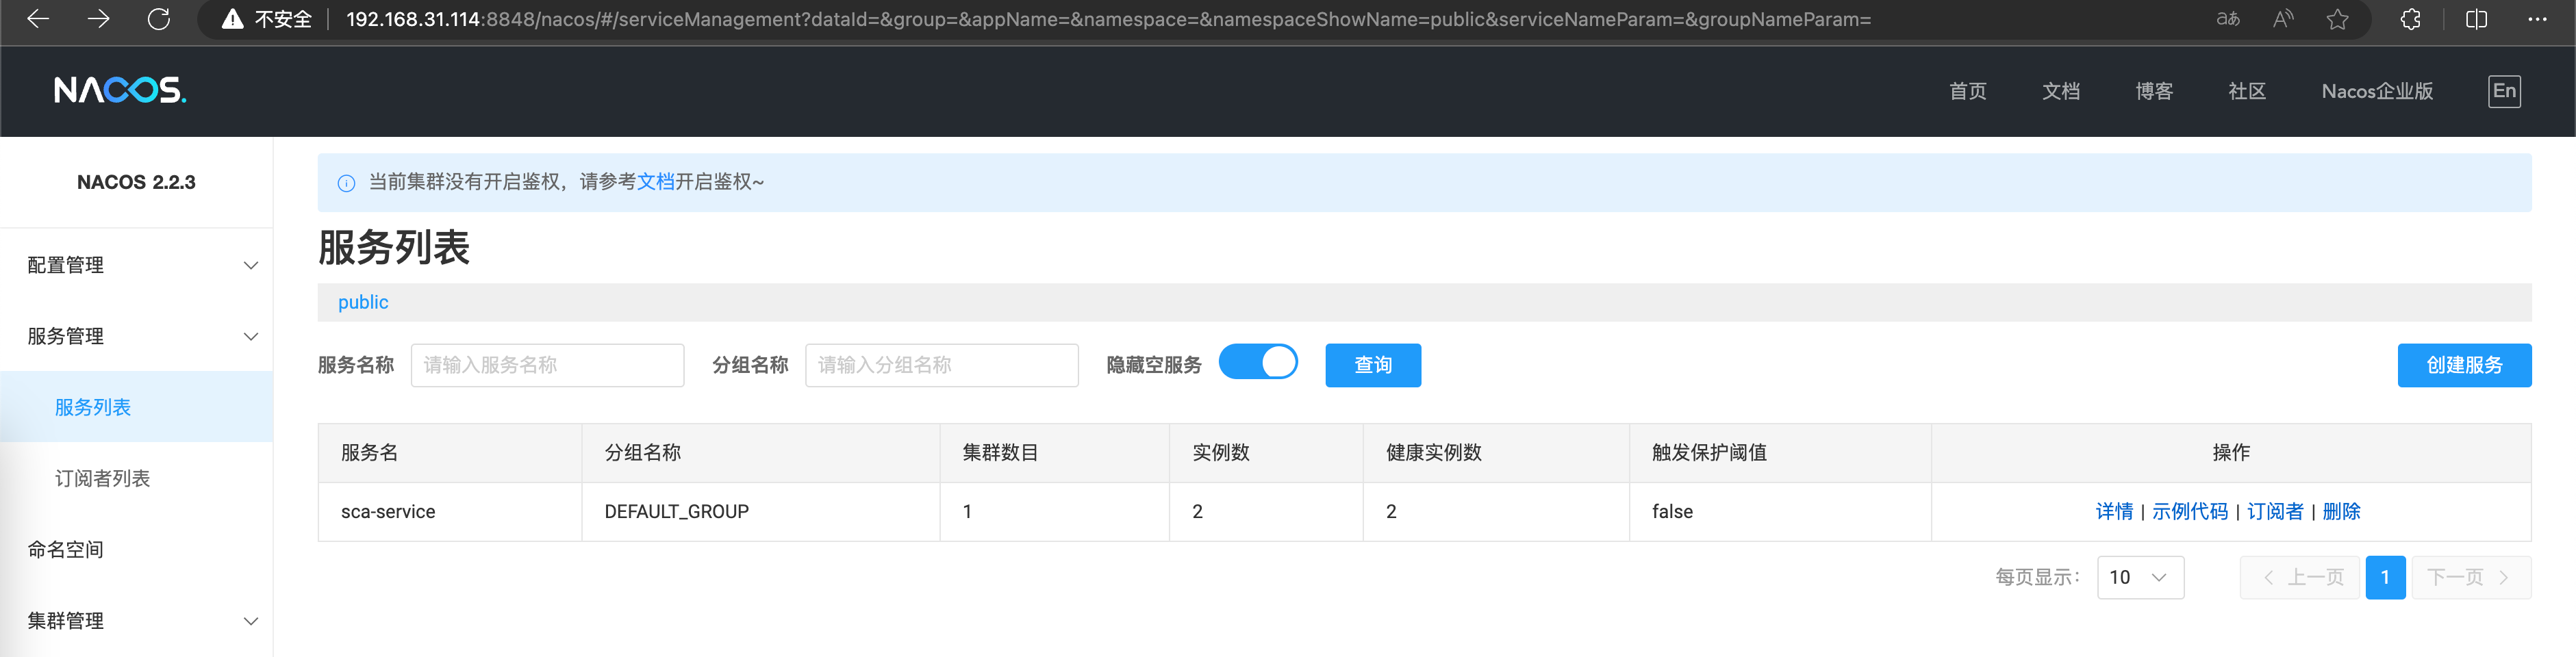
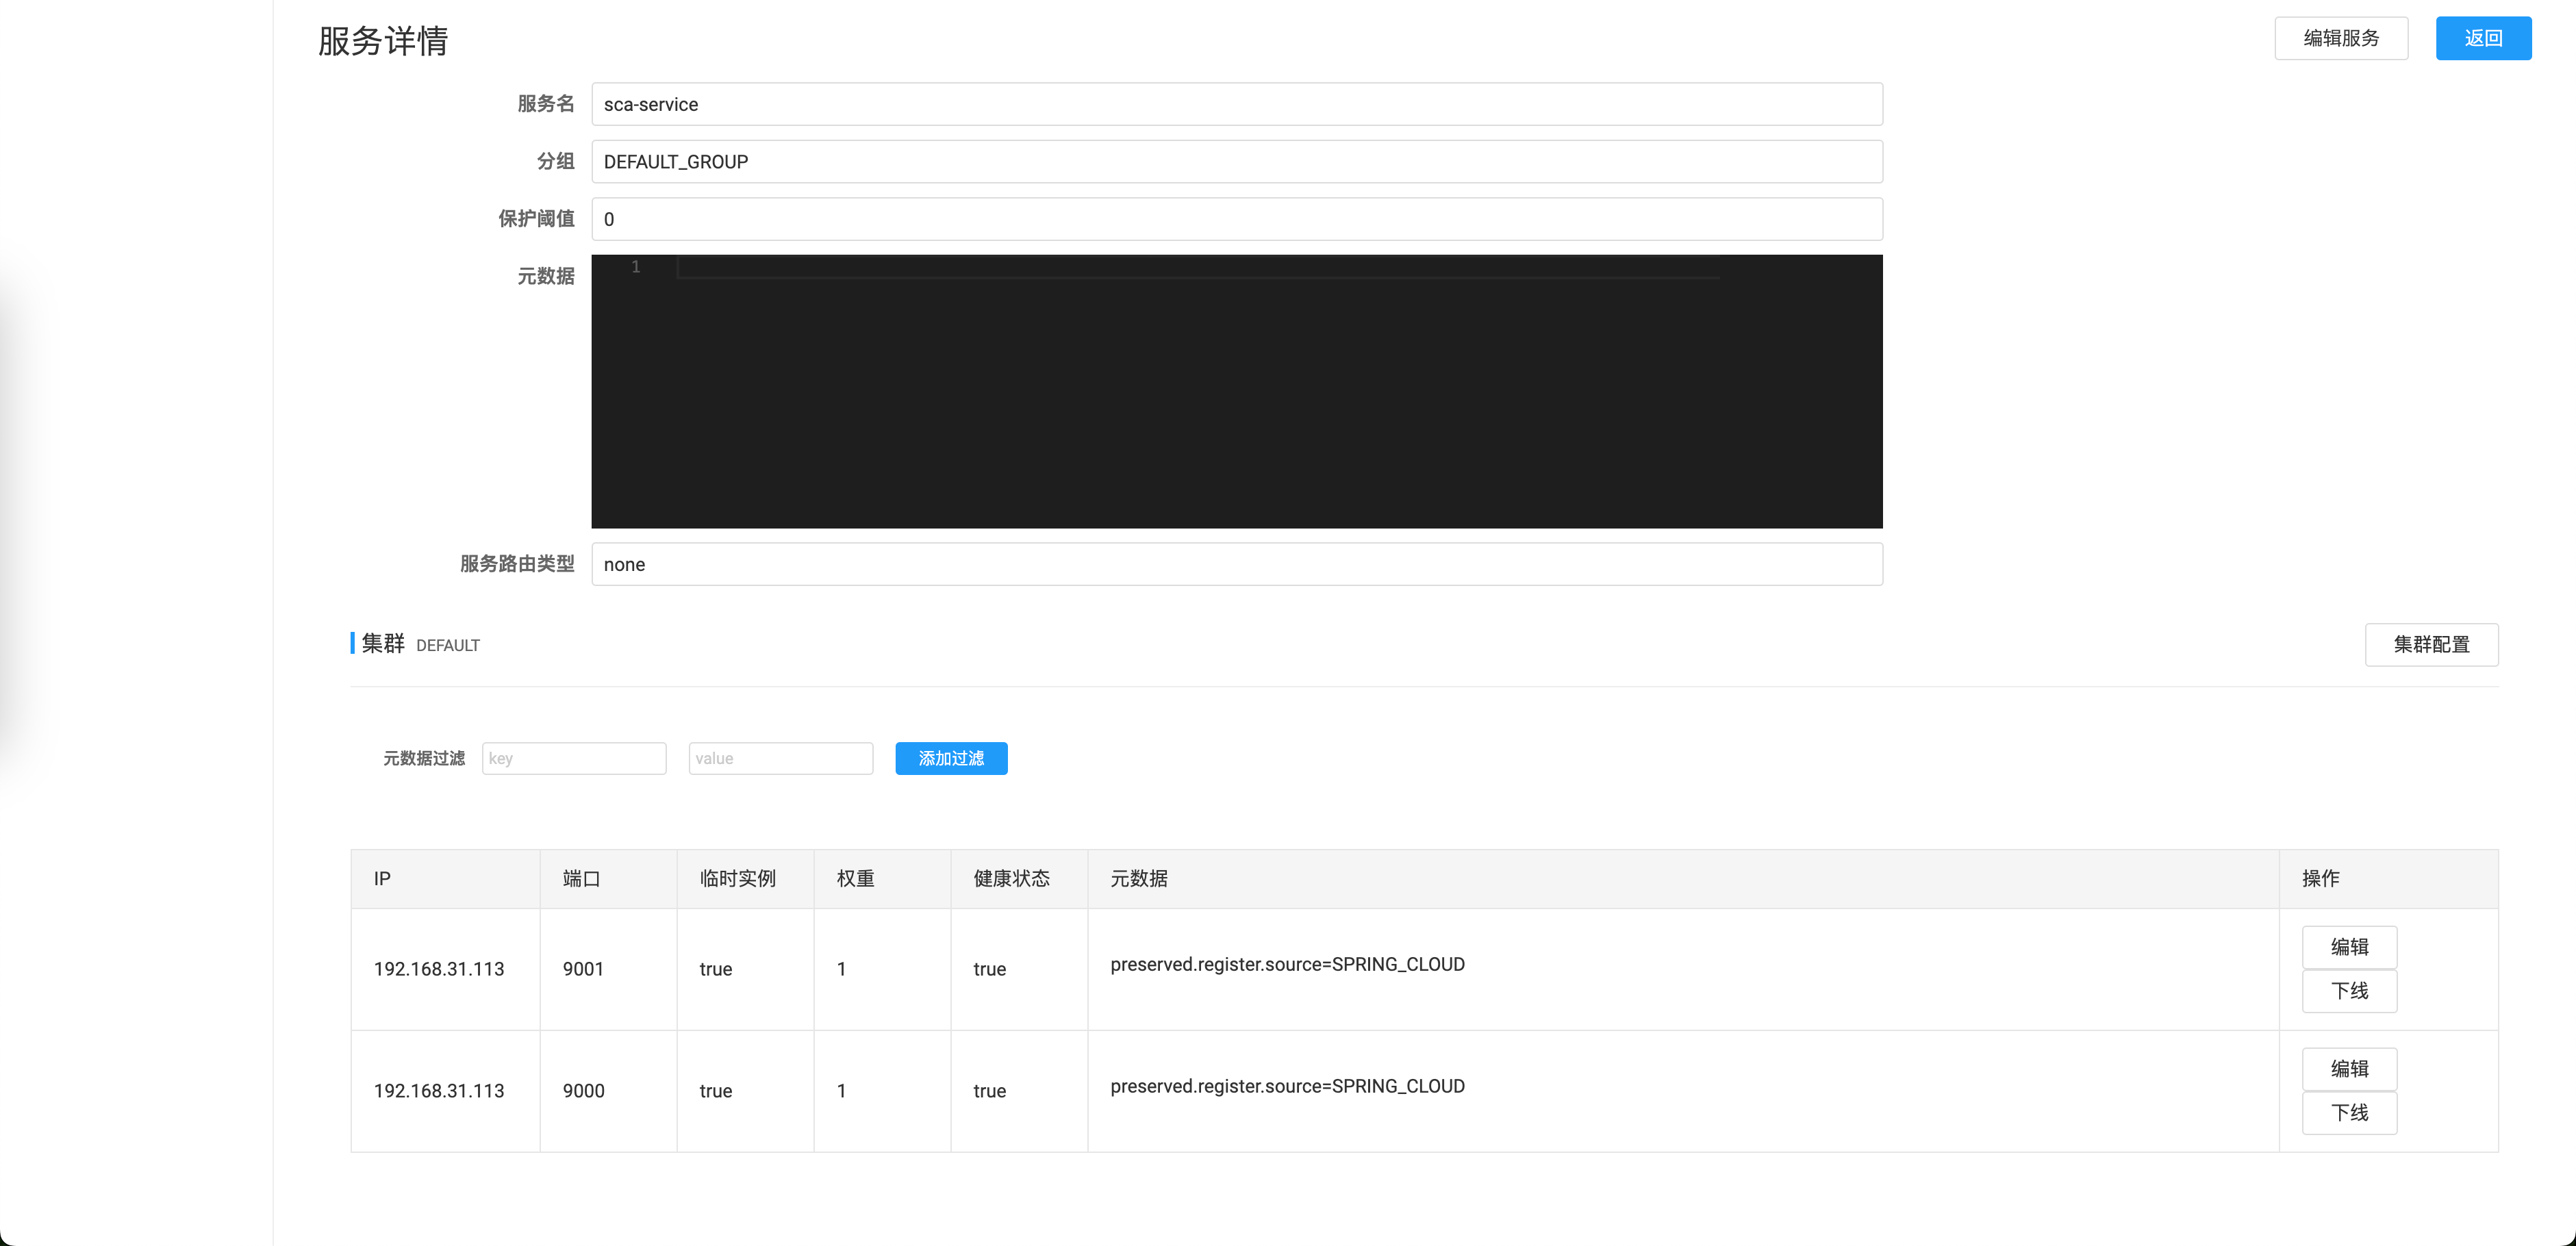
分别以 9000 和 9001 端口启动,可在控制台查看到已注册的服务。
负载均衡
通过 sca-web 调用 sca-service,在 sca-web 项目的 build.gradle.kts 中添加如下依赖。
implementation("com.alibaba.cloud:spring-cloud-starter-alibaba-nacos-discovery")
implementation("org.springframework.cloud:spring-cloud-starter-loadbalancer")
implementation("org.springframework.cloud:spring-cloud-starter-openfeign")
添加 Nacos Discovery 的基本配置。
spring:
  application:
    name: sca-web
  cloud:
    nacos:
      discovery:
        server-addr: 192.168.31.114

server:
  port: 9901
在启动类上添加对应注解,启动即可。
@EnableFeignClients
@SpringBootApplication
@EnableDiscoveryClient
public class ScaWebApplication {
    public static void main(String[] args) {
        SpringApplication.run(ScaWebApplication.class);
    }
}

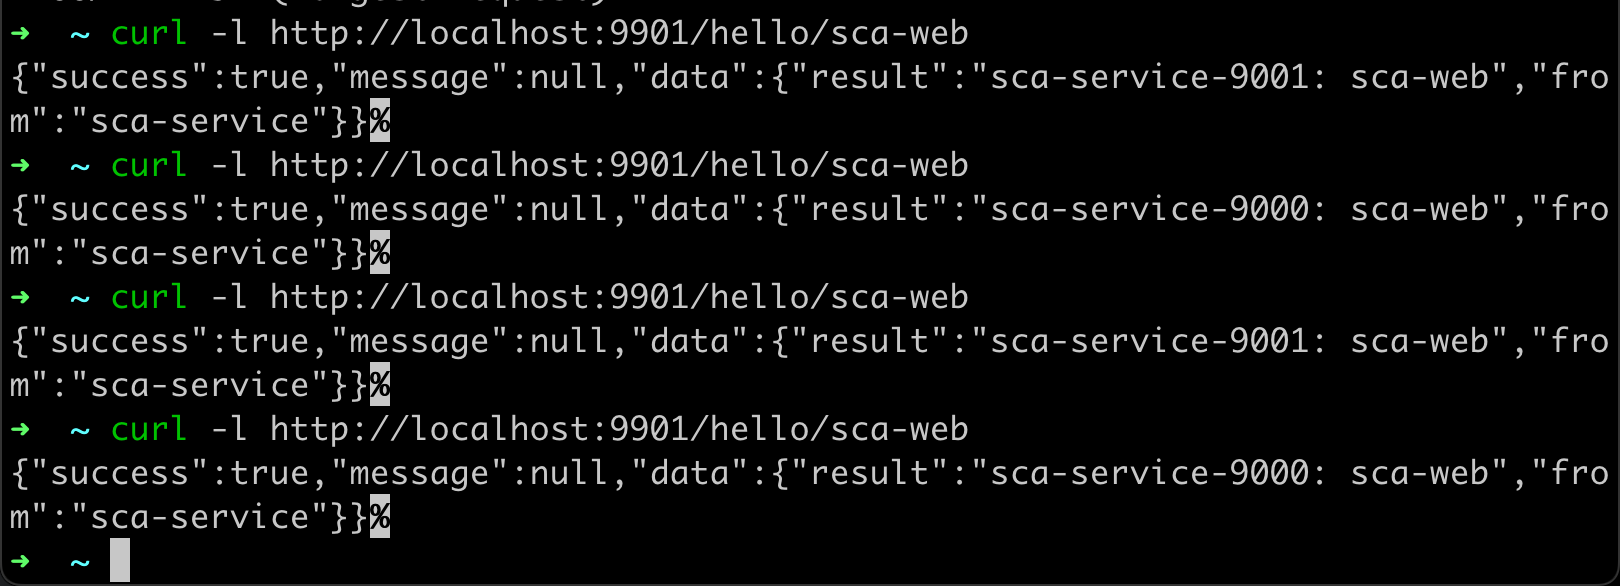
多次调用 sca-web 接口查看返回结果,发现两个节点轮训被访问。
权重路由
通过 Nacos 控制台调整实例权重为 3:1。

在 sca-web 配置文件中添加配置开启权重路由。
spring:
  application:
    name: sca-web
  cloud:
    nacos:
      discovery:
        server-addr: 192.168.31.114
    loadbalancer:
      nacos:
        enabled: true
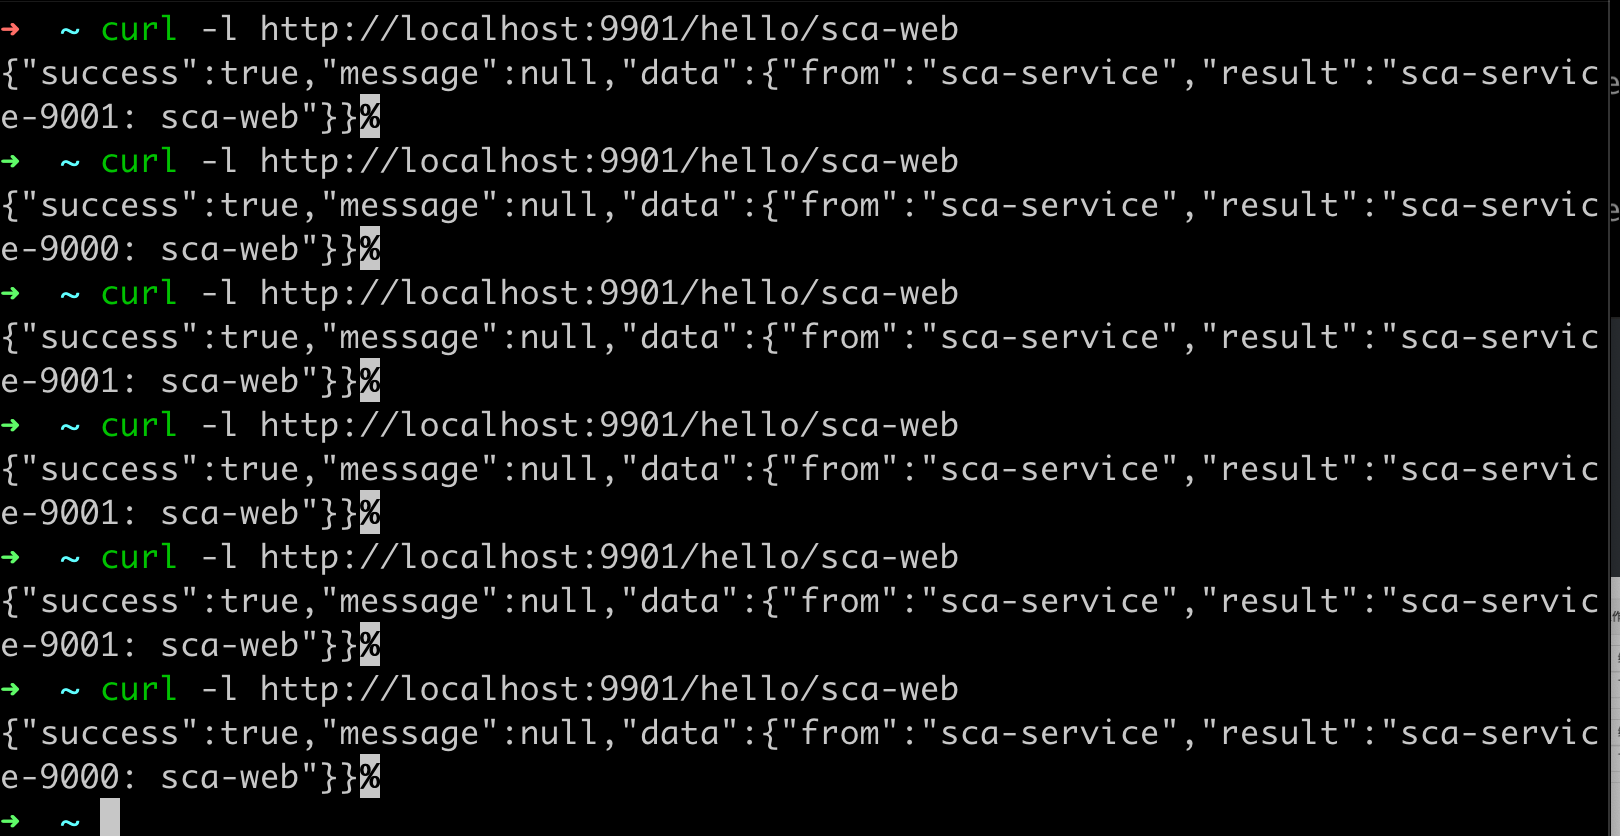
重启服务后多次调用 sca-web 接口查看返回结果,发现权重路由已生效。
Nacos Config
安装 Nacos
安装步骤同上。
动态配置管理
以 sca-web 为例,在项目的 build.gradle.kts 中添加 nacos-config 依赖。
implementation("com.alibaba.cloud:spring-cloud-starter-alibaba-nacos-config")
添加 Nacos Config 的基本配置。
spring:
  application:
    name: sca-web
  cloud:
    nacos:
      config:
        server-addr: 192.168.31.114
      discovery:
        server-addr: 192.168.31.114
    loadbalancer:
      nacos:
        enabled: true
  config:
    import:
      - nacos:sca-web-config.properties
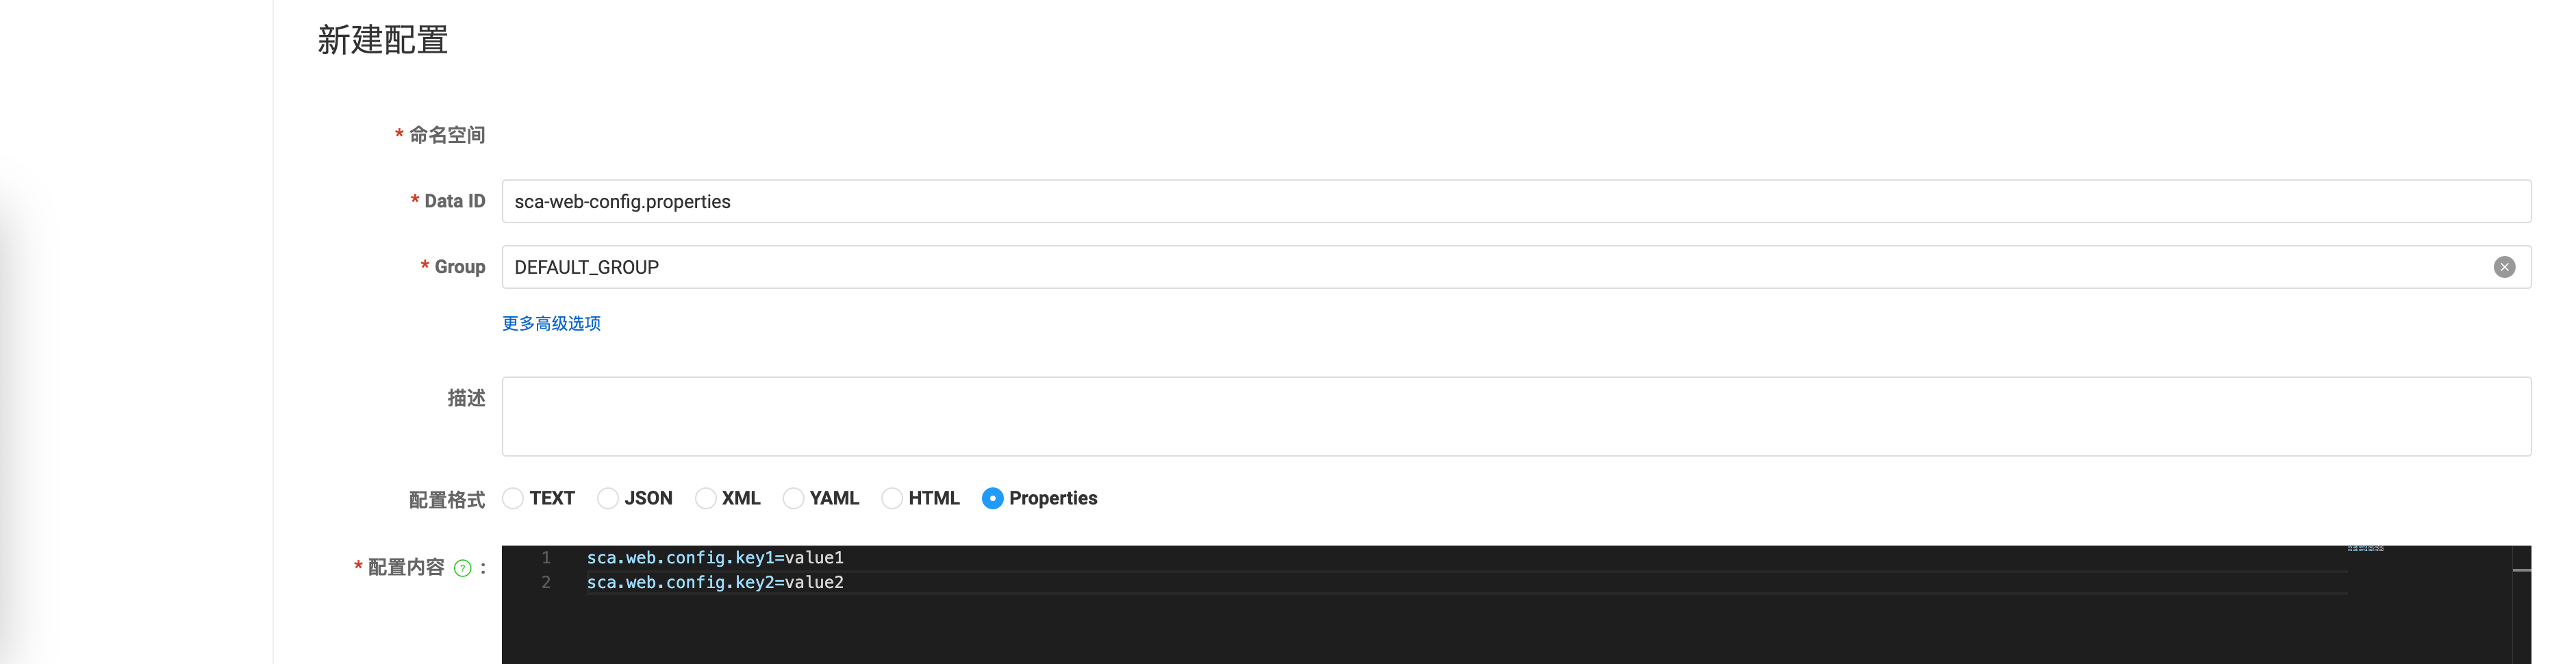
通过 Nacos 控制台创建 Data ID 为 sca-web-config.properties 的配置。
添加一个 Controller 验证。
@RefreshScope
@RestController
public class NacosConfigController {
    @Value("${sca.web.config.key1}")
    private String key1;
    @Value("${sca.web.config.key2}")
    private String key2;

    @GetMapping("/config")
    public Map<String, String> config() {
        return Map.of("key1", key1, "key2", key2);
    }
}
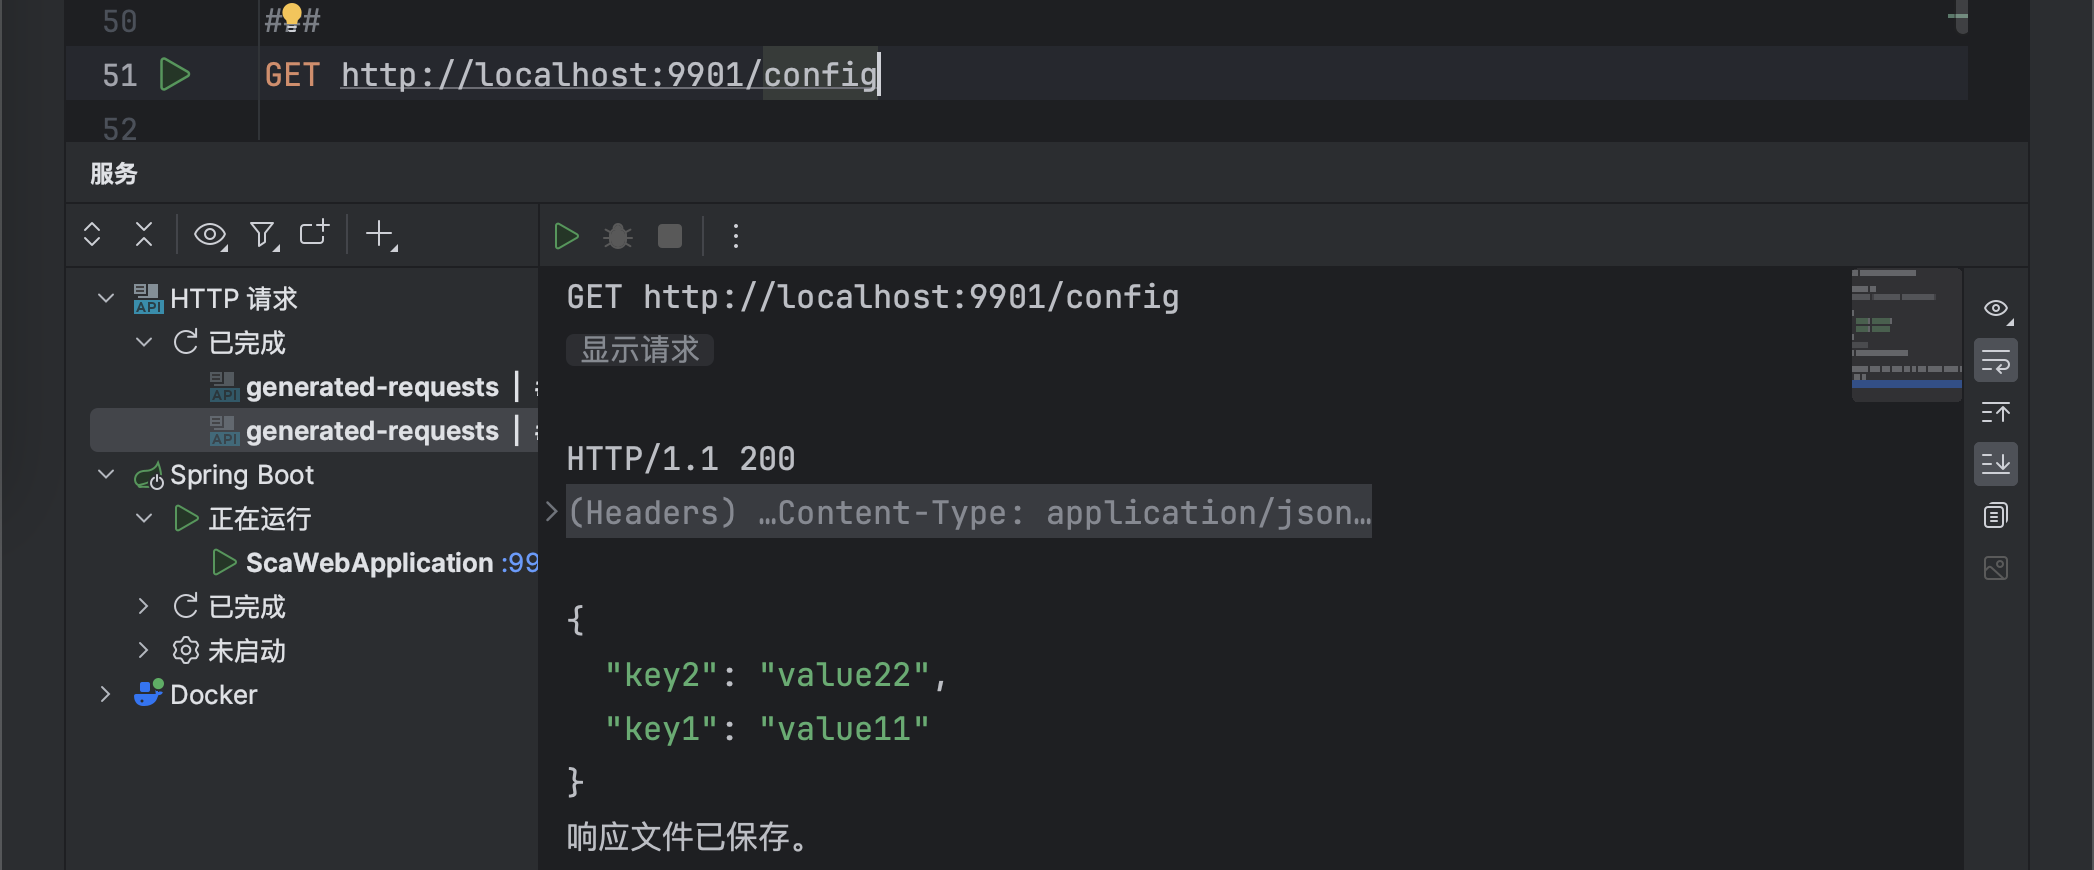
Nacos Config 默认支持配置的动态更新,可以通过配置 spring.cloud.nacos.config.refresh-enabled=false 关闭动态刷新。

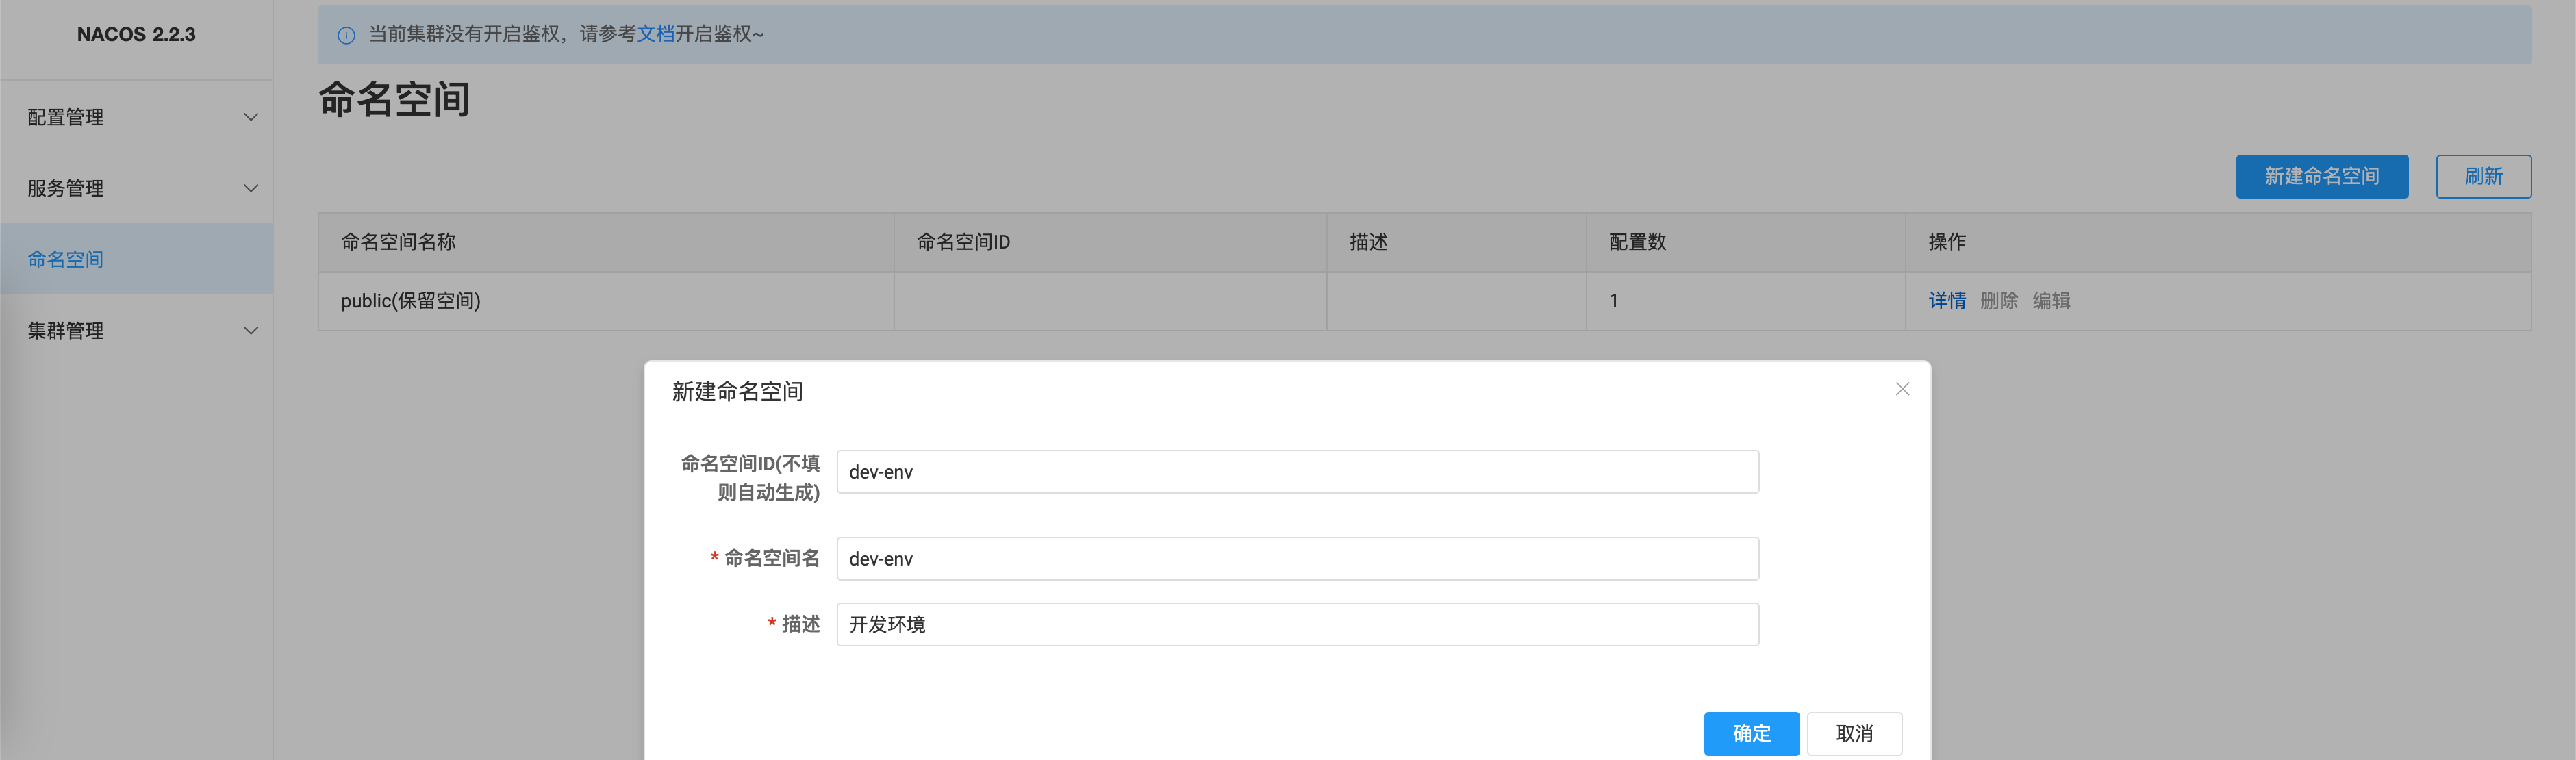
自定义 namespace
通过 Nacos 控制台新建命名空间 dev-env。
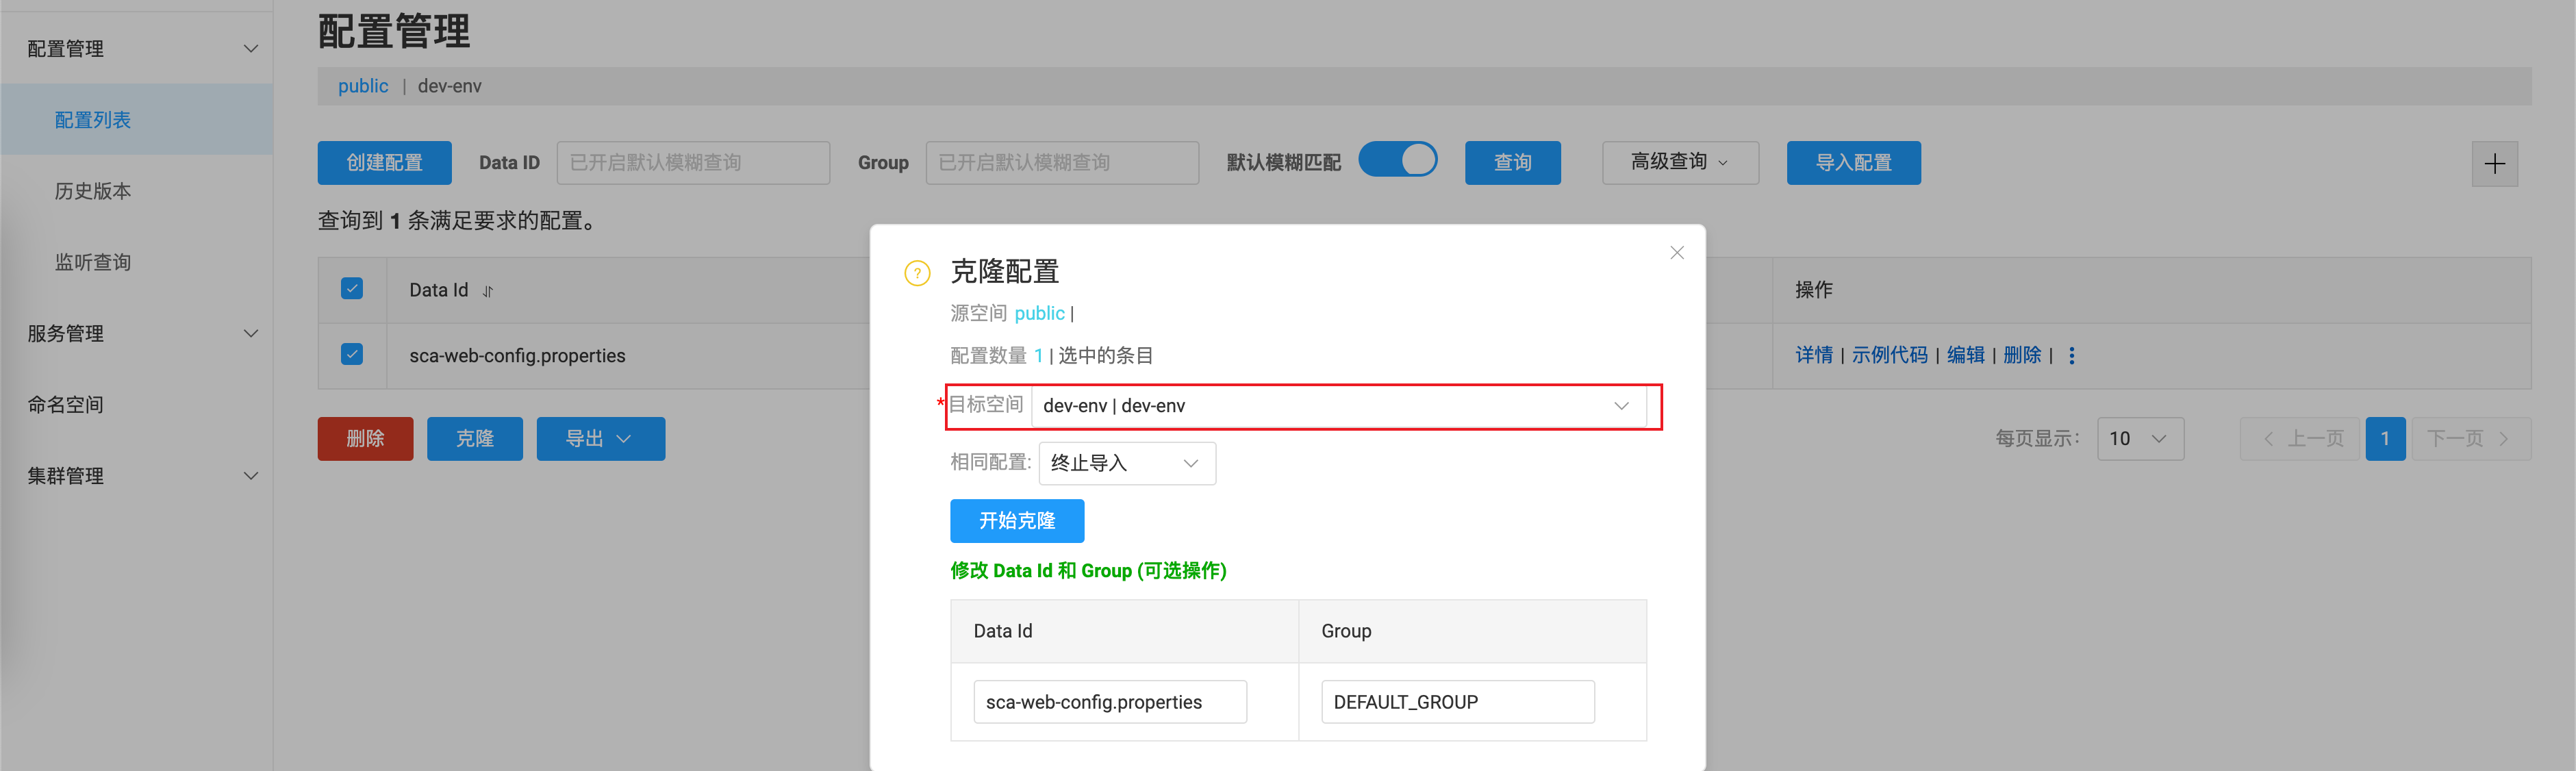
将配置 sca-web-config.properties 复制一份到 dev-env 下。
修改 Nacos Config 的配置,增加命名空间配置。
spring:
  application:
    name: sca-web
  cloud:
    nacos:
      config:
        server-addr: 192.168.31.114
        namespace: dev-env
命名空间的常用场景之一是不同环境的配置的区分隔离,例如开发测试环境和生产环境的资源(如配置、服务)隔离等。
配置获取方式
通过将配置信息配置为bean,支持配置变自动刷新。
@Component
@ConfigurationProperties(prefix = "sca.web.config")
public class ConfigBean {
    private String key1;
    private String key2;
  	// getter and setter
}
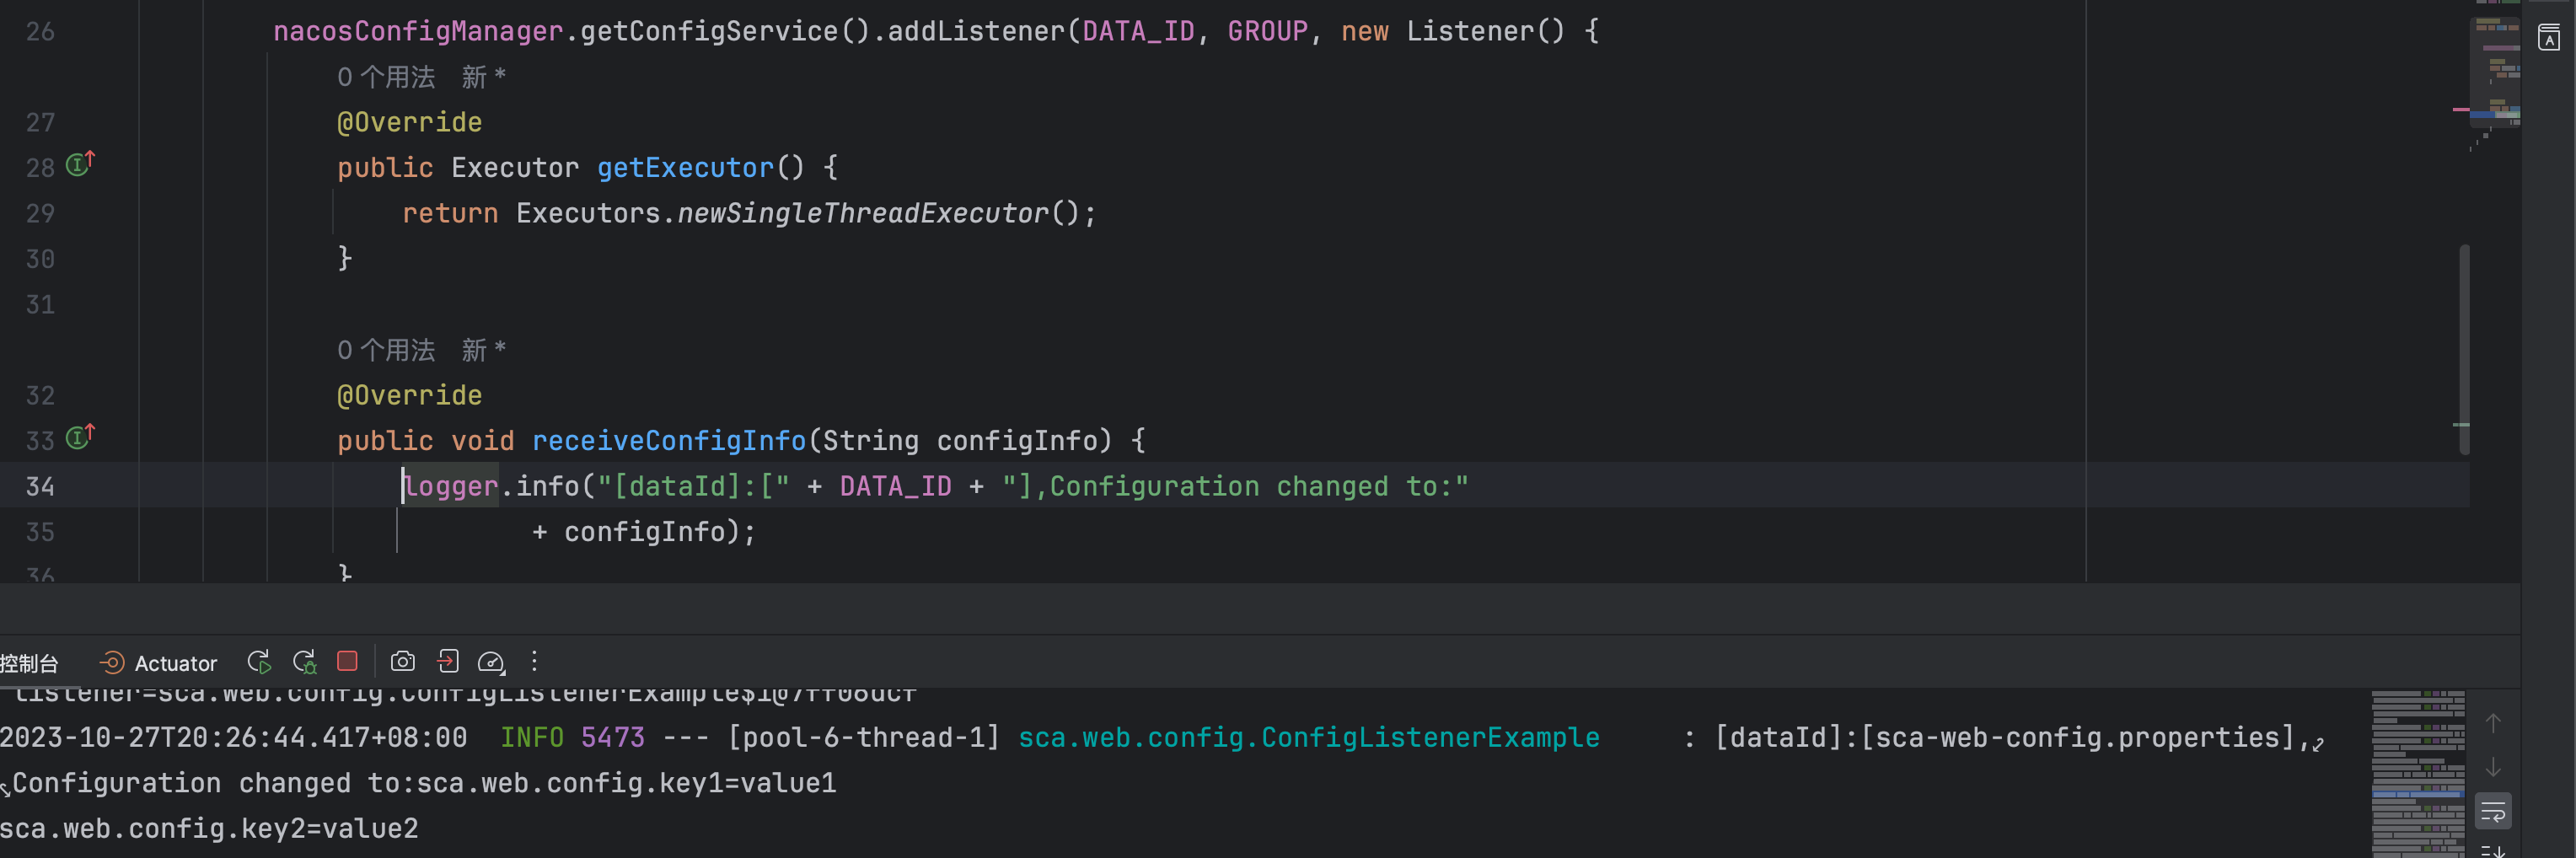
监听配置信息。
@Component
public class ConfigListenerExample {
    private final Logger logger = LoggerFactory.getLogger(ConfigListenerExample.class);
    @Resource
    private NacosConfigManager nacosConfigManager;
    String DATA_ID = "sca-web-config.properties";
    String GROUP = "DEFAULT_GROUP";

    @PostConstruct
    public void init() throws NacosException {

        nacosConfigManager.getConfigService().addListener(DATA_ID, GROUP, new Listener() {
            @Override
            public Executor getExecutor() {
                return Executors.newSingleThreadExecutor();
            }

            @Override
            public void receiveConfigInfo(String configInfo) {
                logger.info("[dataId]:[" + DATA_ID + "],Configuration changed to:"
                        + configInfo);
            }
        });
    }
}
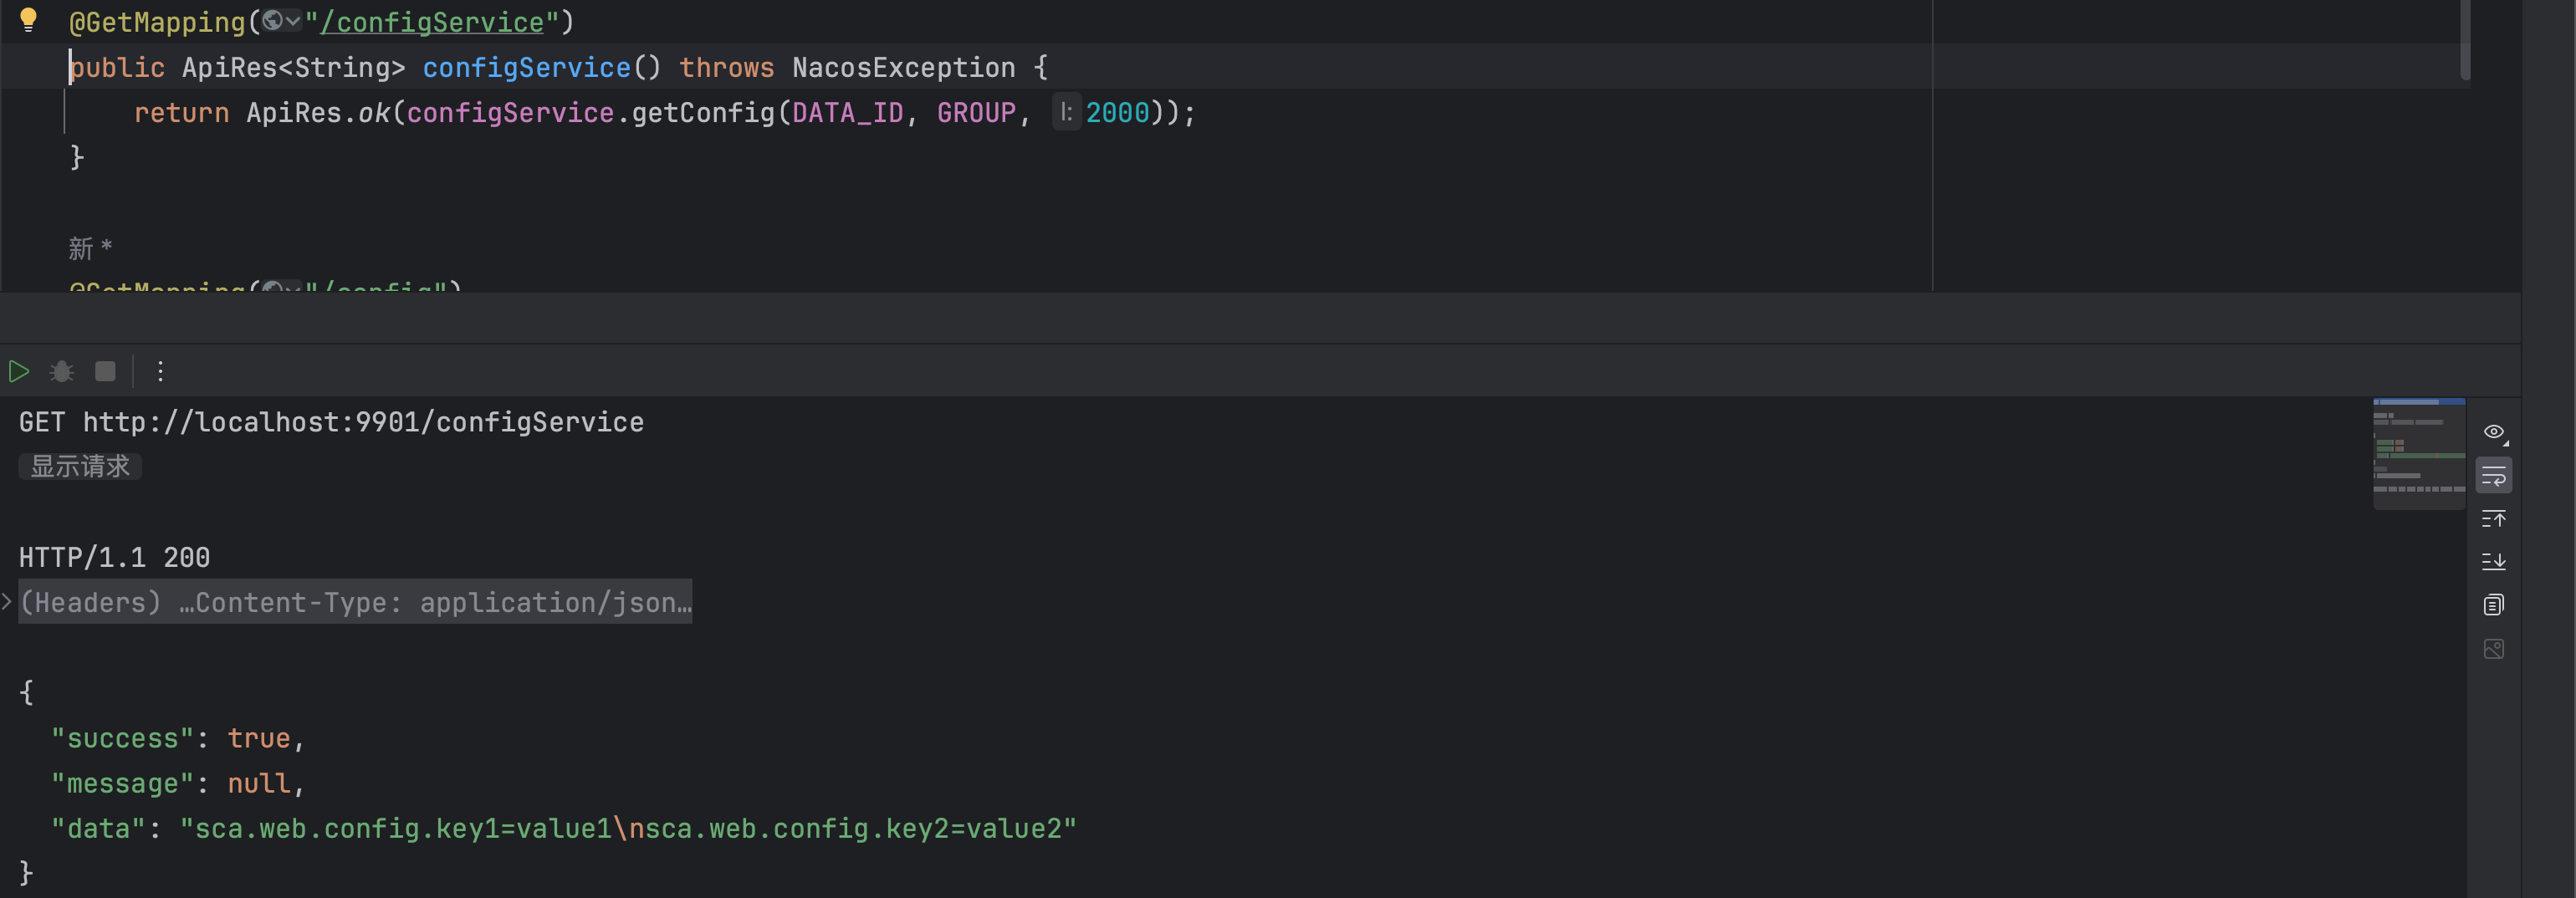
对接 nacos 接口,通过接口完成配置信息查询。
private final ConfigService configService;

public NacosConfigController(NacosConfigManager nacosConfigManager) {
    this.configService = nacosConfigManager.getConfigService();
}

@GetMapping("/configService")
public ApiRes<String> configService() throws NacosException {
    return ApiRes.ok(configService.getConfig(DATA_ID, GROUP, 2000));
}
通过 @Value 注解进行配置信息获取,注意需要增加 @RefreshScope 注解。
在配置中心修改配置的内容时,会发布 Spring 中的 RefreshEvent 事件。 带有 @RefreshScope 和 @ConfigurationProperties 注解的类会自动刷新。
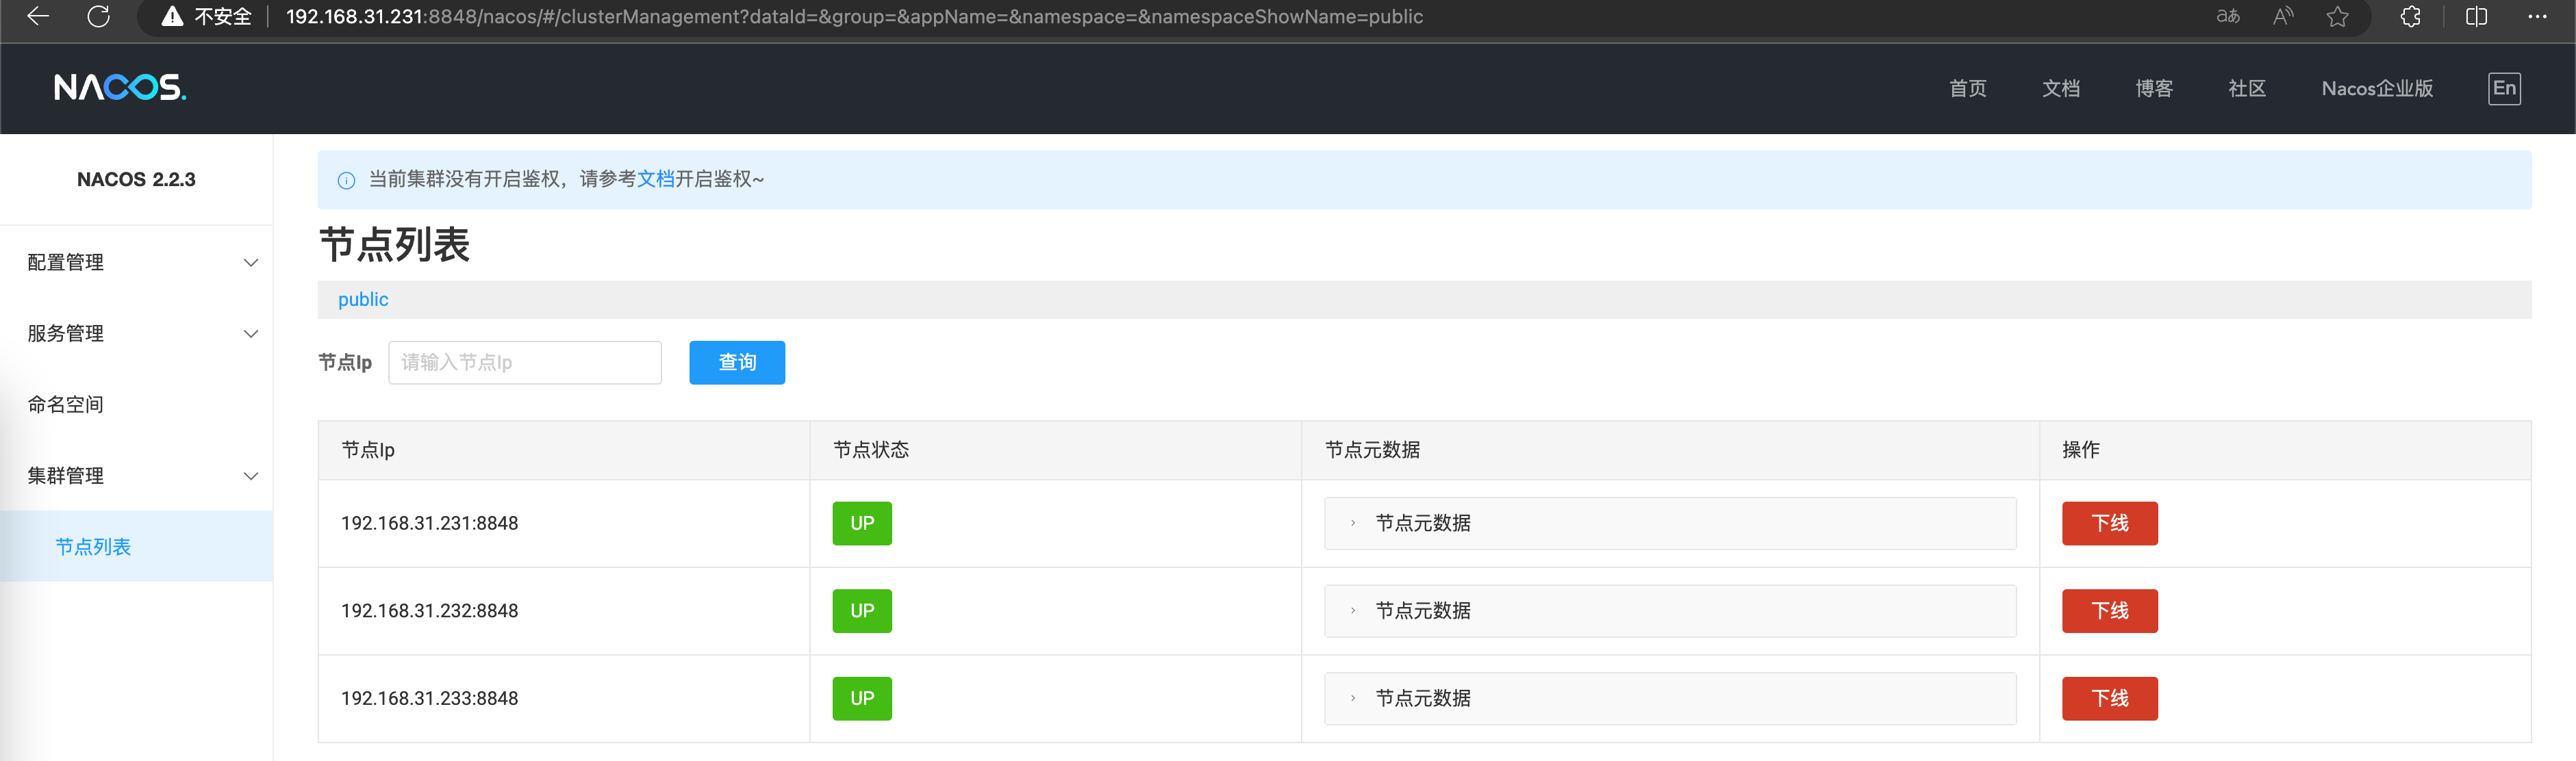
Nacos 集群模式
Nacos 集群部署
https://nacos.io/zh-cn/docs/cluster-mode-quick-start.html
配置集群配置文件,创建配置文件 nacos/conf/acluster.conf,每行配置成 ip:port。
192.168.31.231:8848
192.168.31.232:8848
192.168.31.233:8848
为 Nacos 集群创建数据库,并执行 nacos/conf/mysql-schema.sql 初始化 SQL 语句。
CREATE DATABASE `nacos` DEFAULT CHARACTER SET utf8mb4 COLLATE utf8mb4_general_ci DEFAULT ENCRYPTION = 'N'
修改 nacos/conf/application.properties配置文件,配置 MySQL 连接信息。
### If use MySQL as datasource:
spring.sql.init.platform=mysql
### Count of DB:
db.num=1
### Connect URL of DB:
db.url.0=jdbc:mysql://192.168.31.114:3306/nacos?characterEncoding=utf8&connectTimeout=1000&socketTimeout=3000&autoReconnect=true&useUnicode=true&useSSL=false&serverTimezone=UTC
db.user.0=root
db.password.0=950915
使用命令 bash startup.sh 启动 Nacos 服务。

使用 Nacos 集群
仅需要修改 server-addr 指向多个服务即可。
spring:
  application:
    name: sca-web
  cloud:
    nacos:
      config:
        server-addr: ${nacos.server-addr}
        namespace: dev-env
      discovery:
        server-addr: ${nacos.server-addr}
  config:
    import:
      - nacos:sca-web-config.properties

nacos:
  server-addr: 192.168.31.231,192.168.31.232,192.168.31.233
Sentinel
Sentinel 是面向分布式、多语言异构化服务架构的流量治理组件,主要以流量为切入点,从流量控制、流量路由、熔断降级、系统自适应保护等多个维度来帮助用户保障微服务的稳定性。
Sentinel 控制台
从 https://github.com/alibaba/Sentinel/releases 下载最新版 sentinel-dashboard,使用命令 java -jar sentinel-dashboard-1.8.6.jar 直接启动即可。
nohup java -jar sentinel-dashboard-1.8.6.jar > /dev/null 2>&1 &
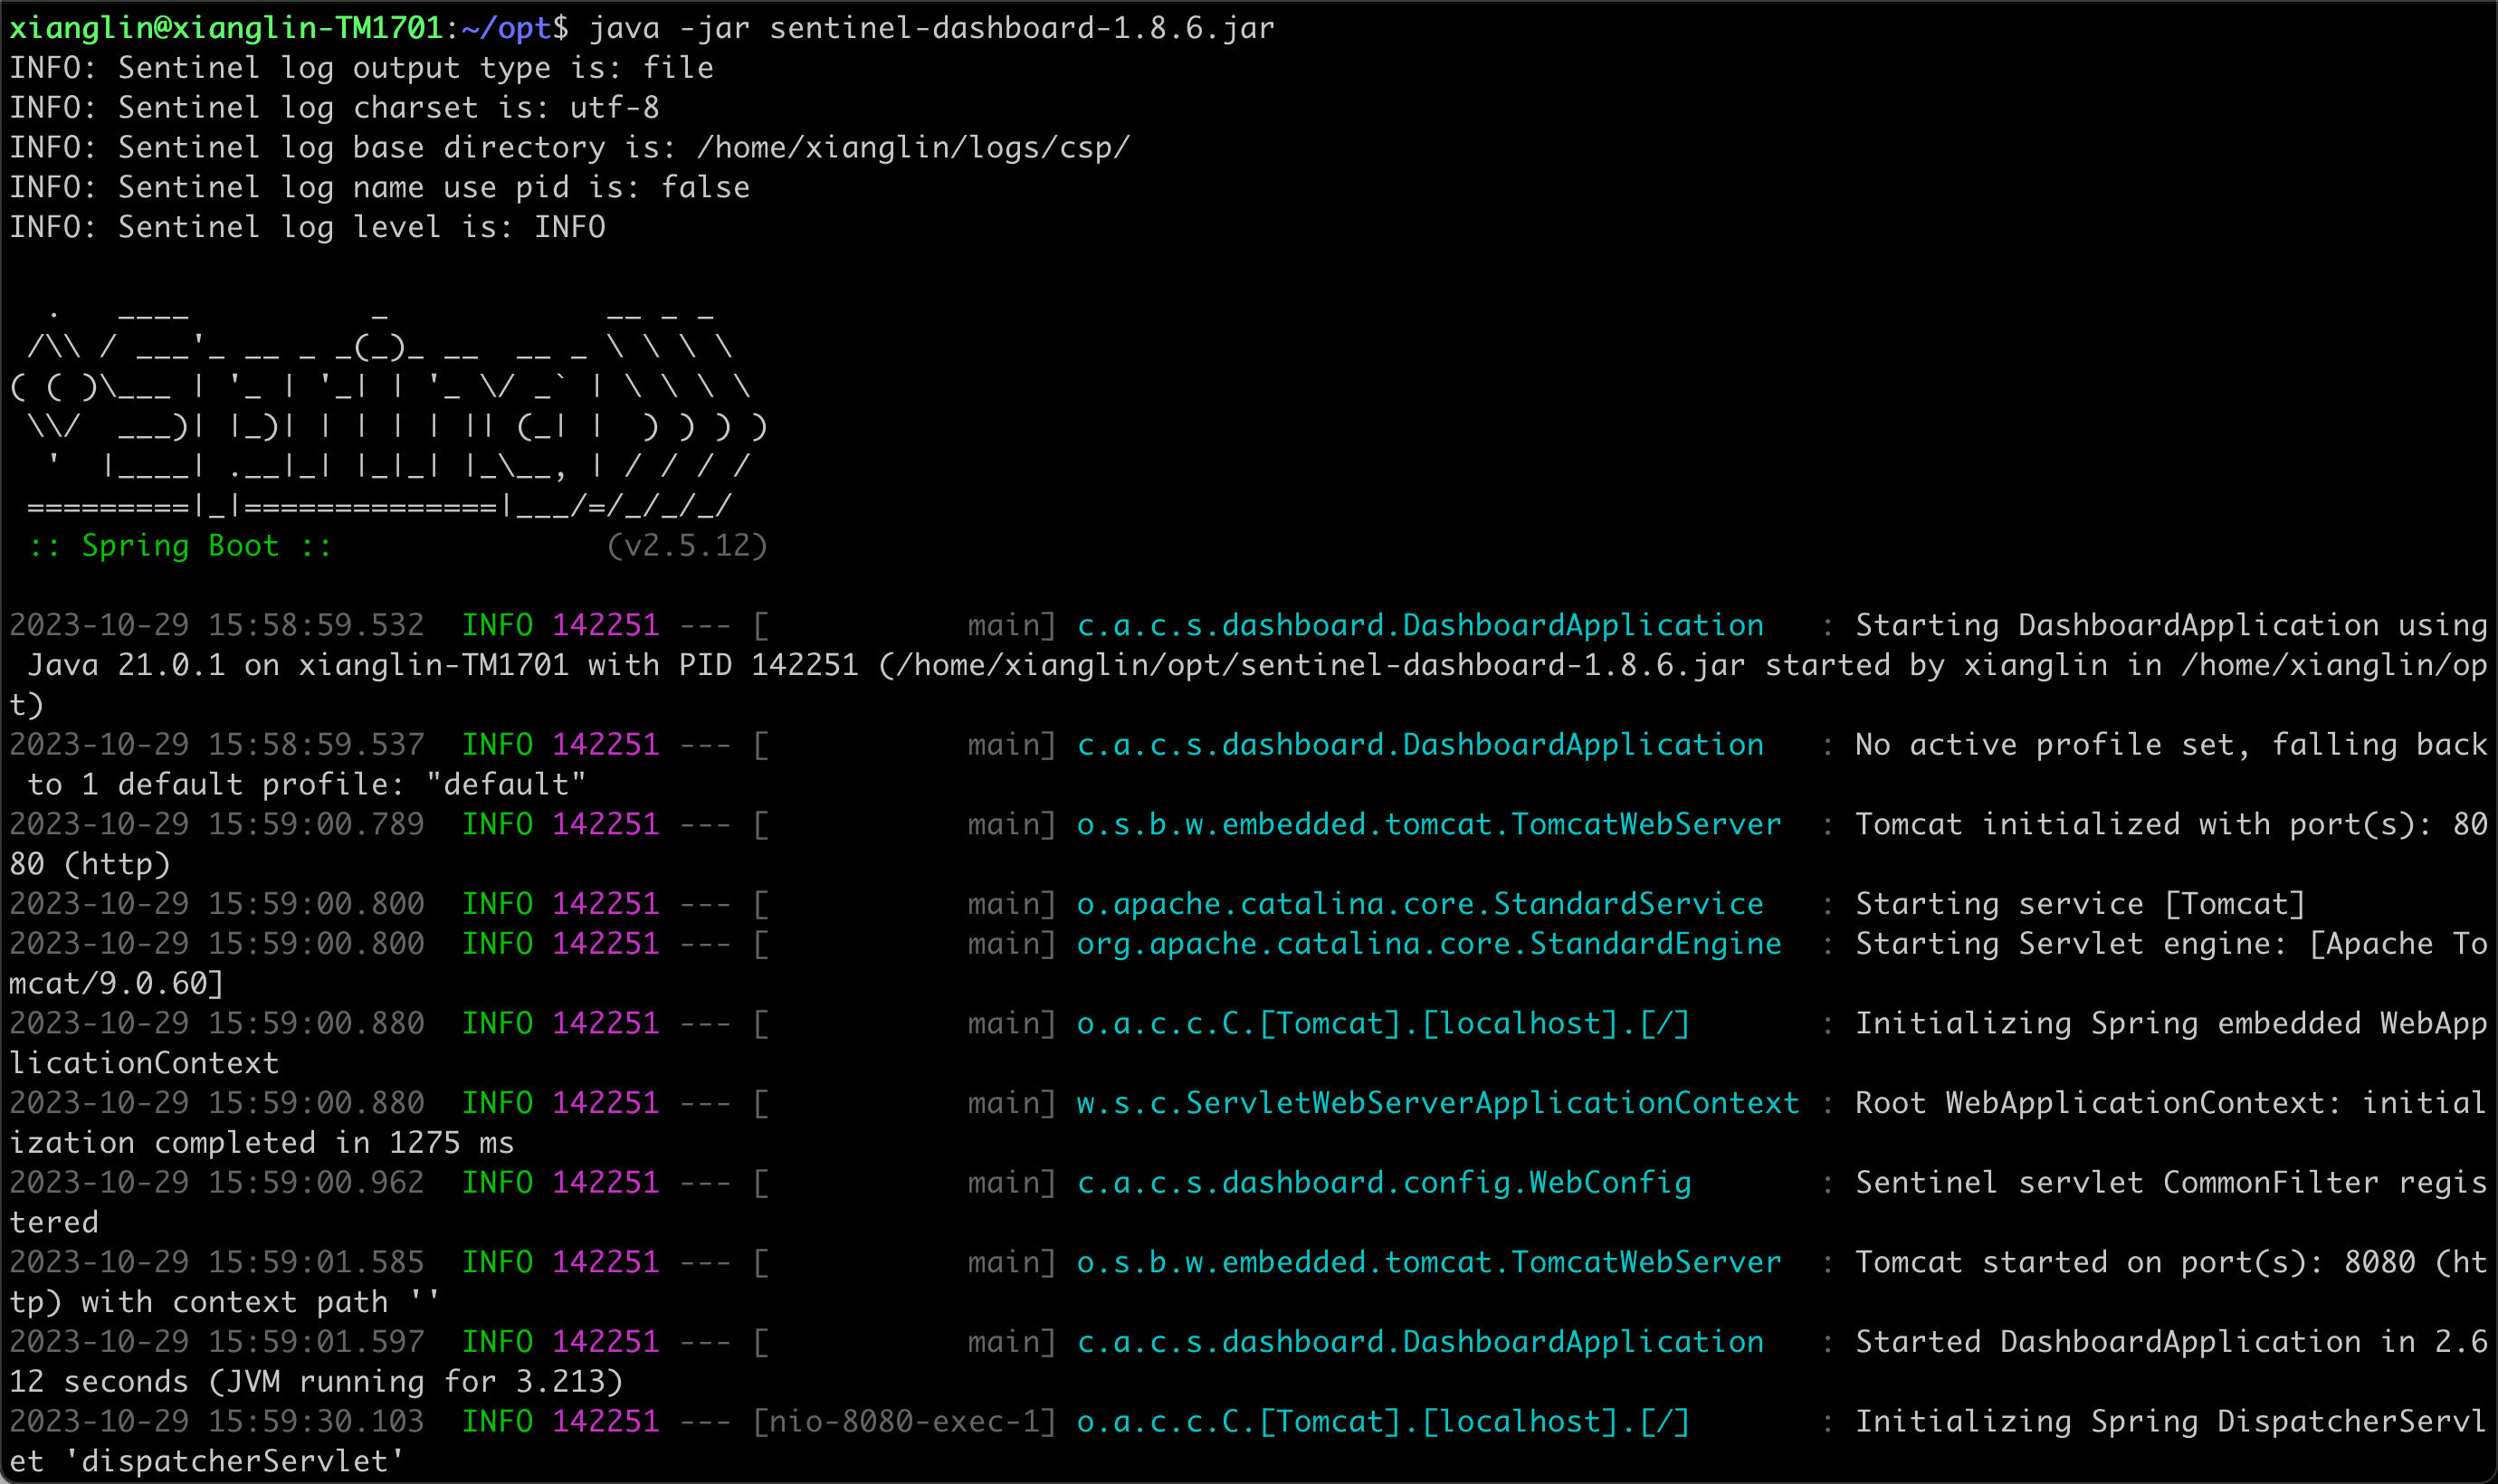
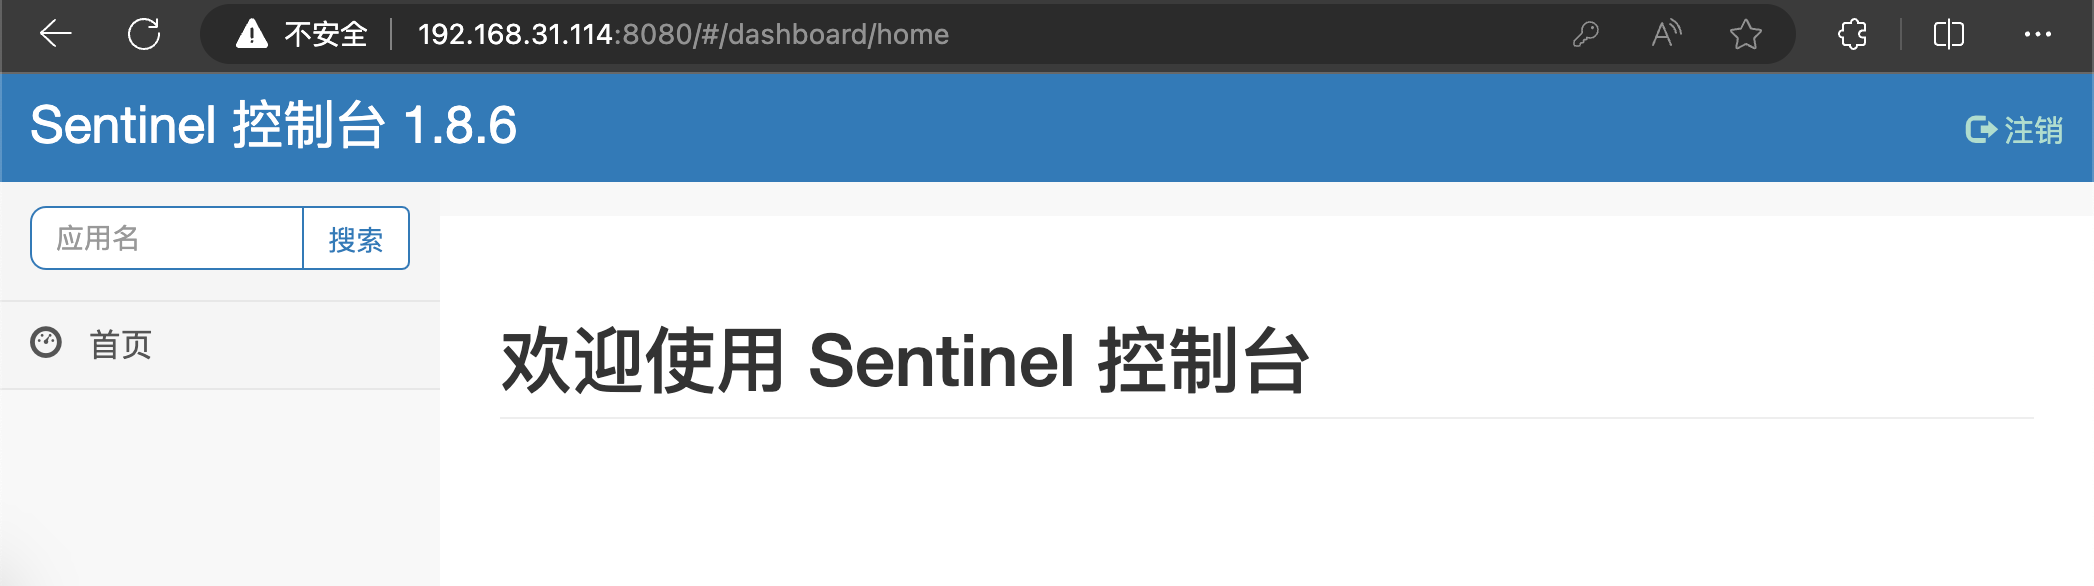
启动完成后可打开控制台 http://192.168.31.114:8080/#/login,输入默认密码 sentinel / sentinel。
使用 Sentinel
以 sca-web 为例,在项目的 build.gradle.kts 中添加 sentinel 依赖。
implementation("com.alibaba.cloud:spring-cloud-starter-alibaba-sentinel")
添加控制台配置信息。
spring:
  application:
    name: sca-web
  cloud:
    sentinel:
      transport:
        dashboard: 192.168.31.114:8080
        port: 8719
这里的 spring.cloud.sentinel.transport.port 端口配置会在应用对应的机器上启动一个 Http Server,该 Server 会与 Sentinel 控制台做交互。比如 Sentinel 控制台添加了1个限流规则,会把规则数据 push 给这个 Http Server 接收,Http Server 再将规则注册到 Sentinel 中。
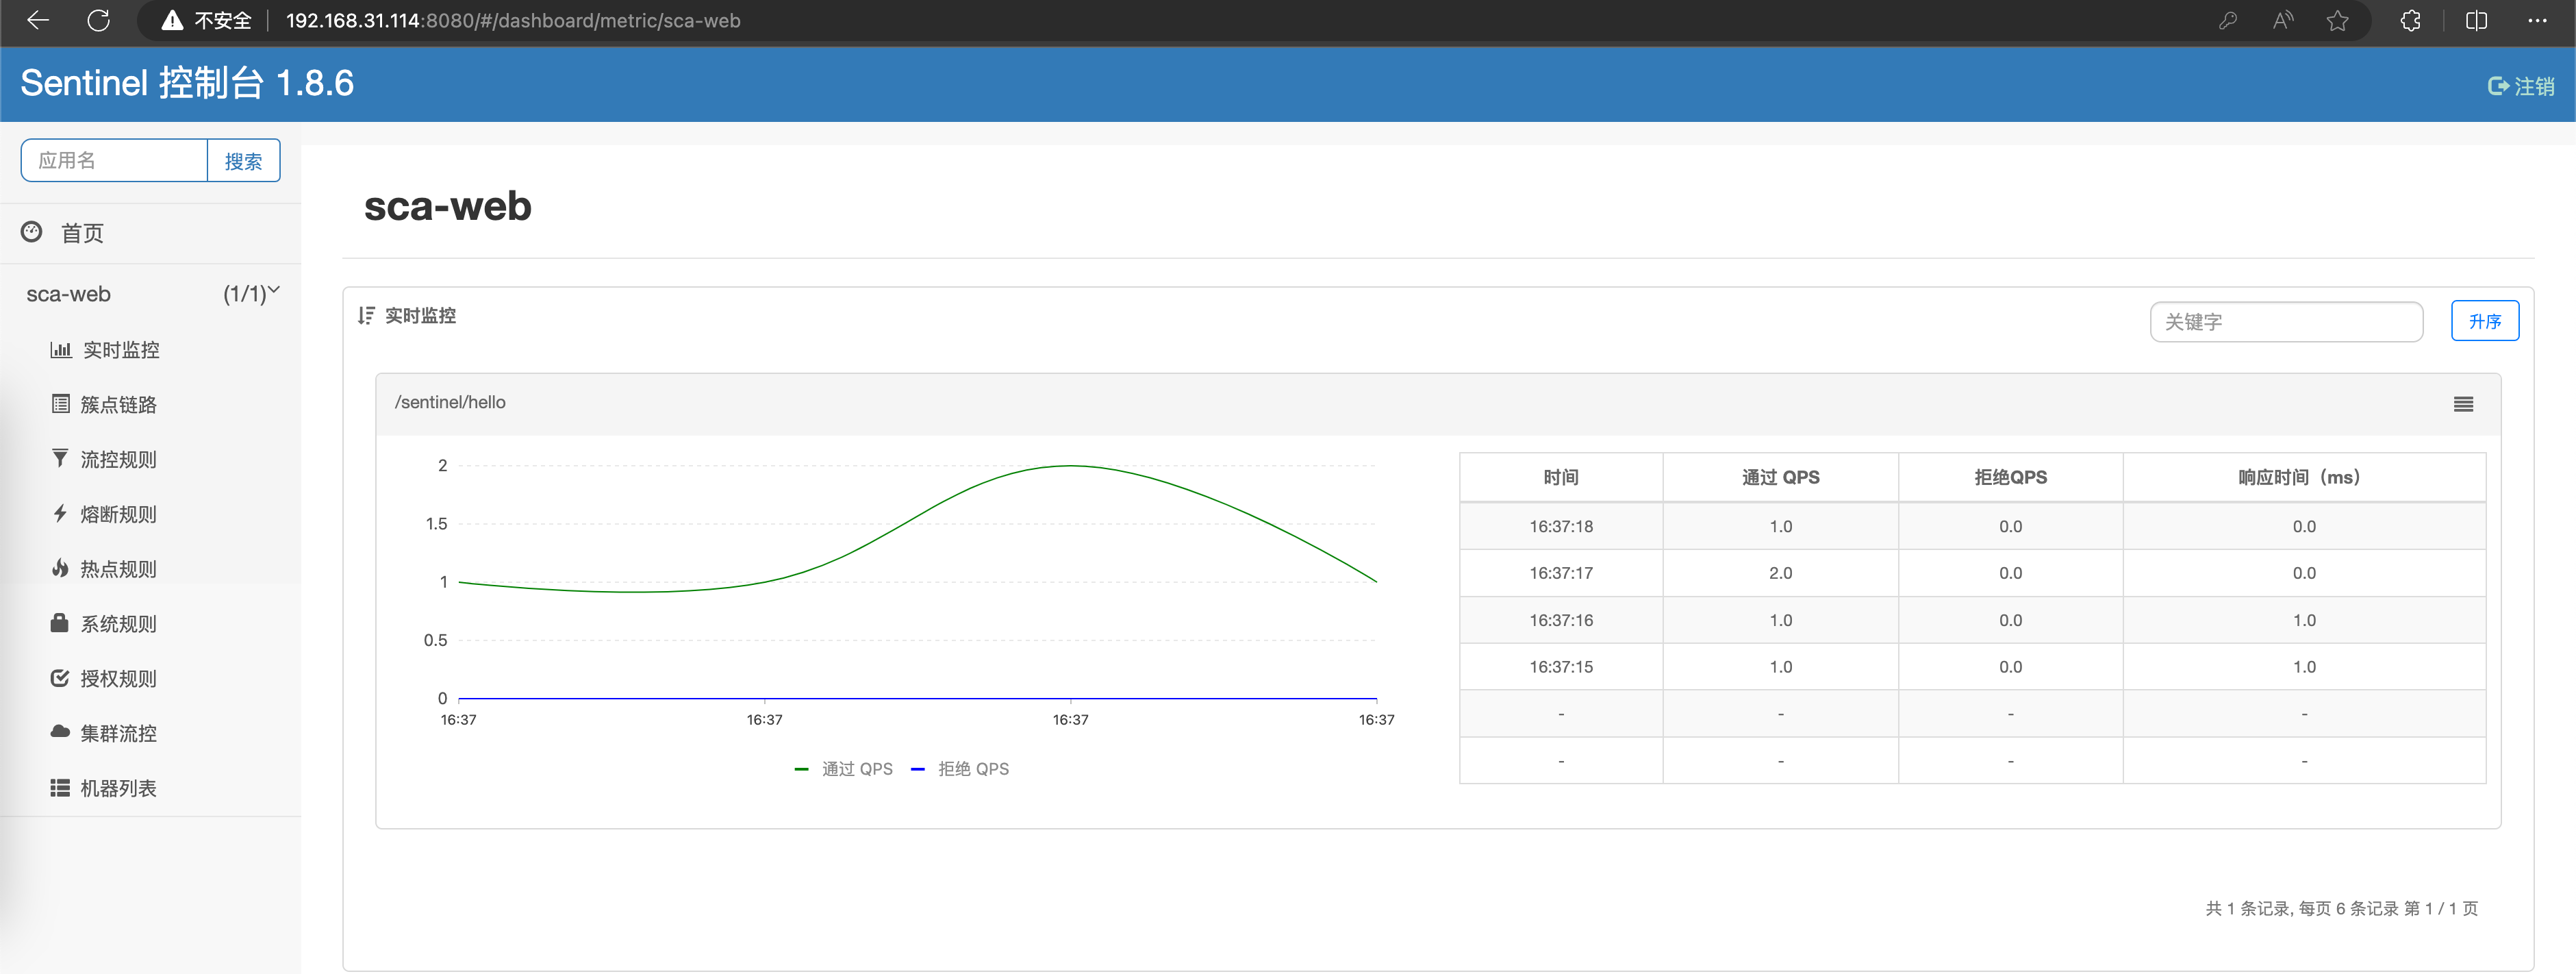
启动 sca-web 服务,发送几次请求,然后打开 Sentinel 控制台可看到实时监控信息。
Sentinel 流控规则
https://sentinelguard.io/zh-cn/docs/flow-control.html
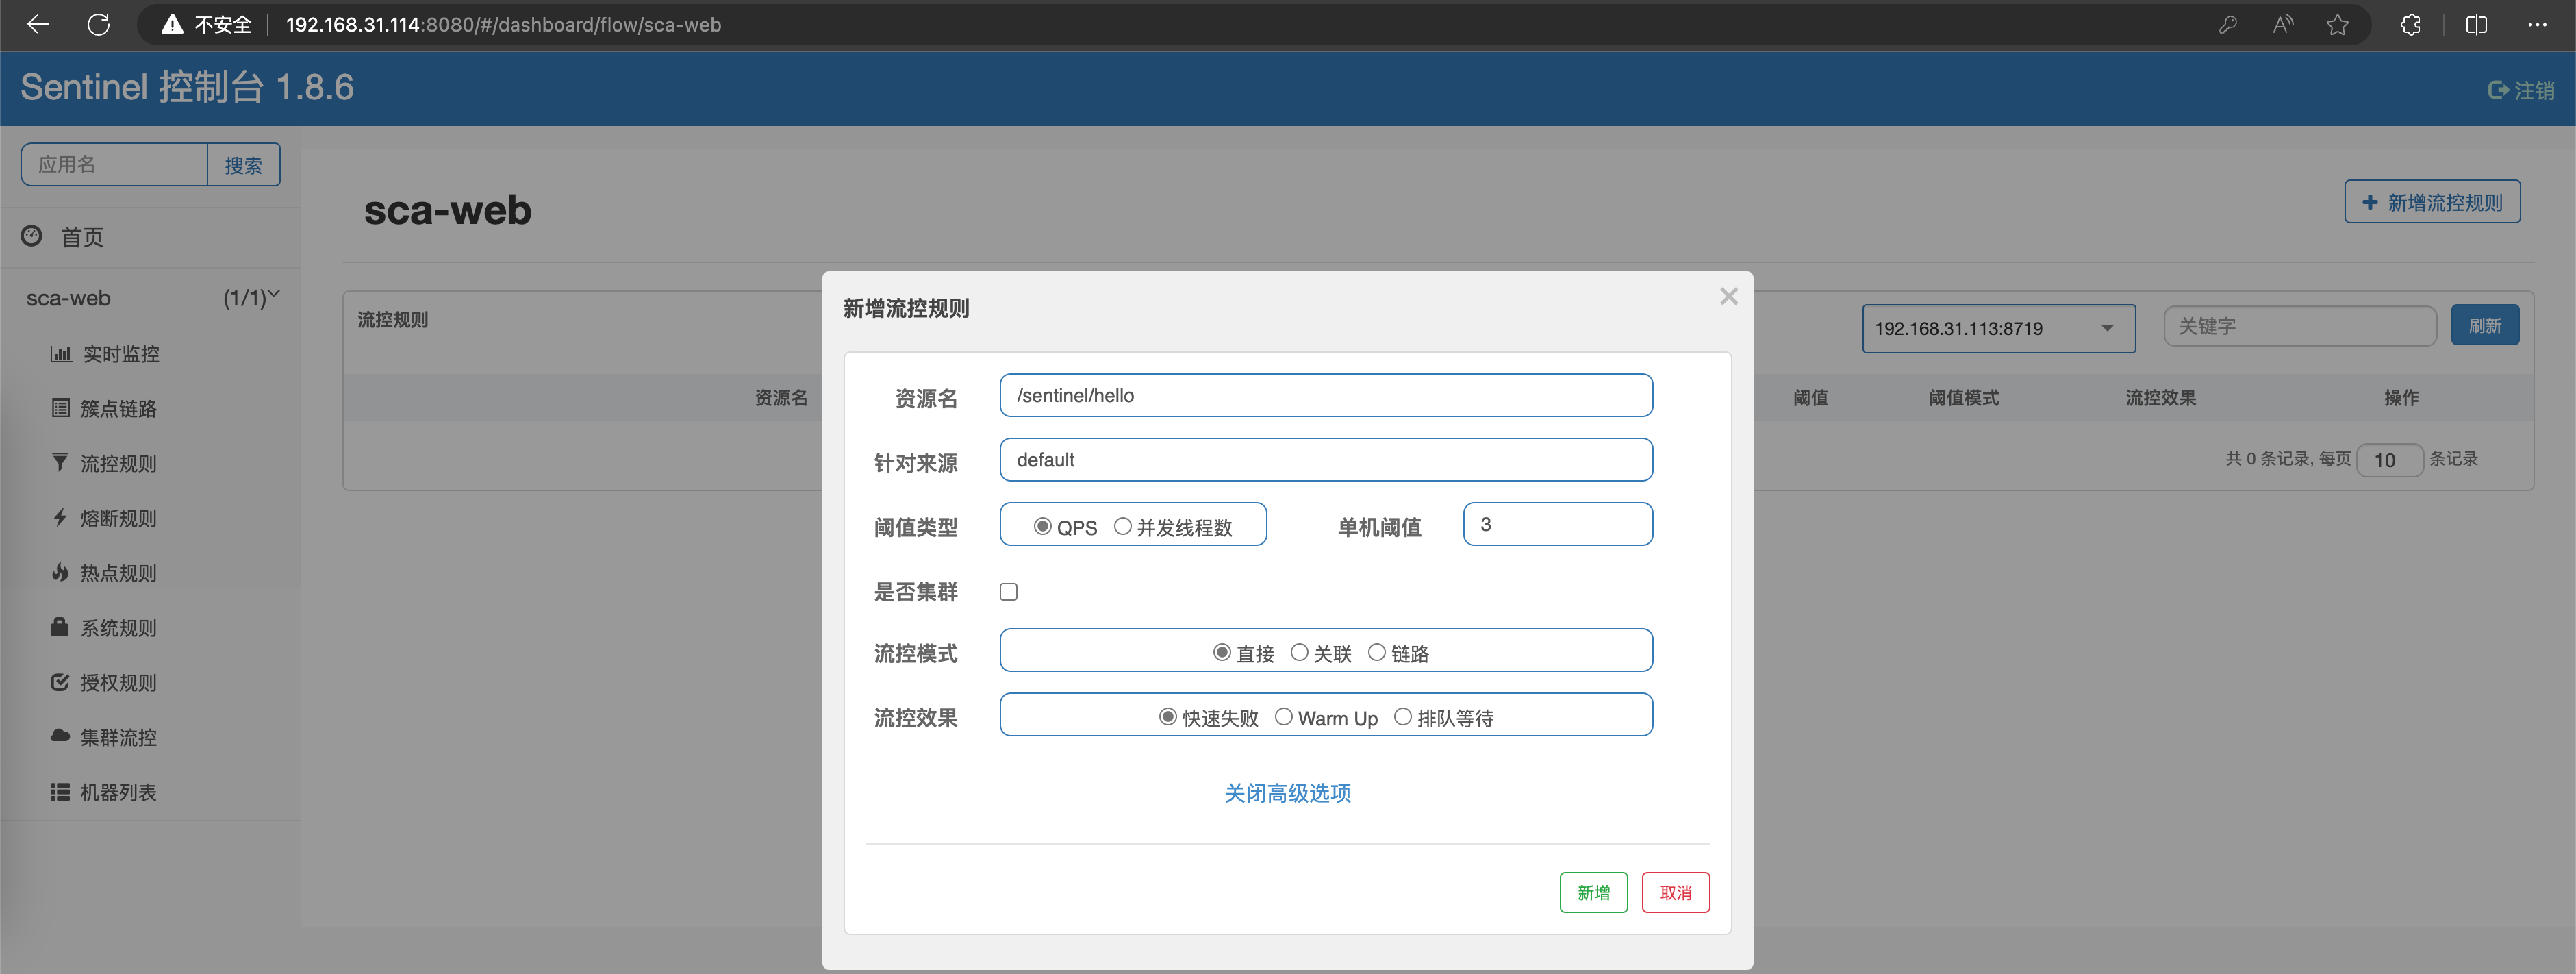
QPS 类型限流。
为 /sentinel/hello 添加流控规则,限制 QPS 阈值为 3,然后多次请求接口,可看到触发流控后的默认失败效果。

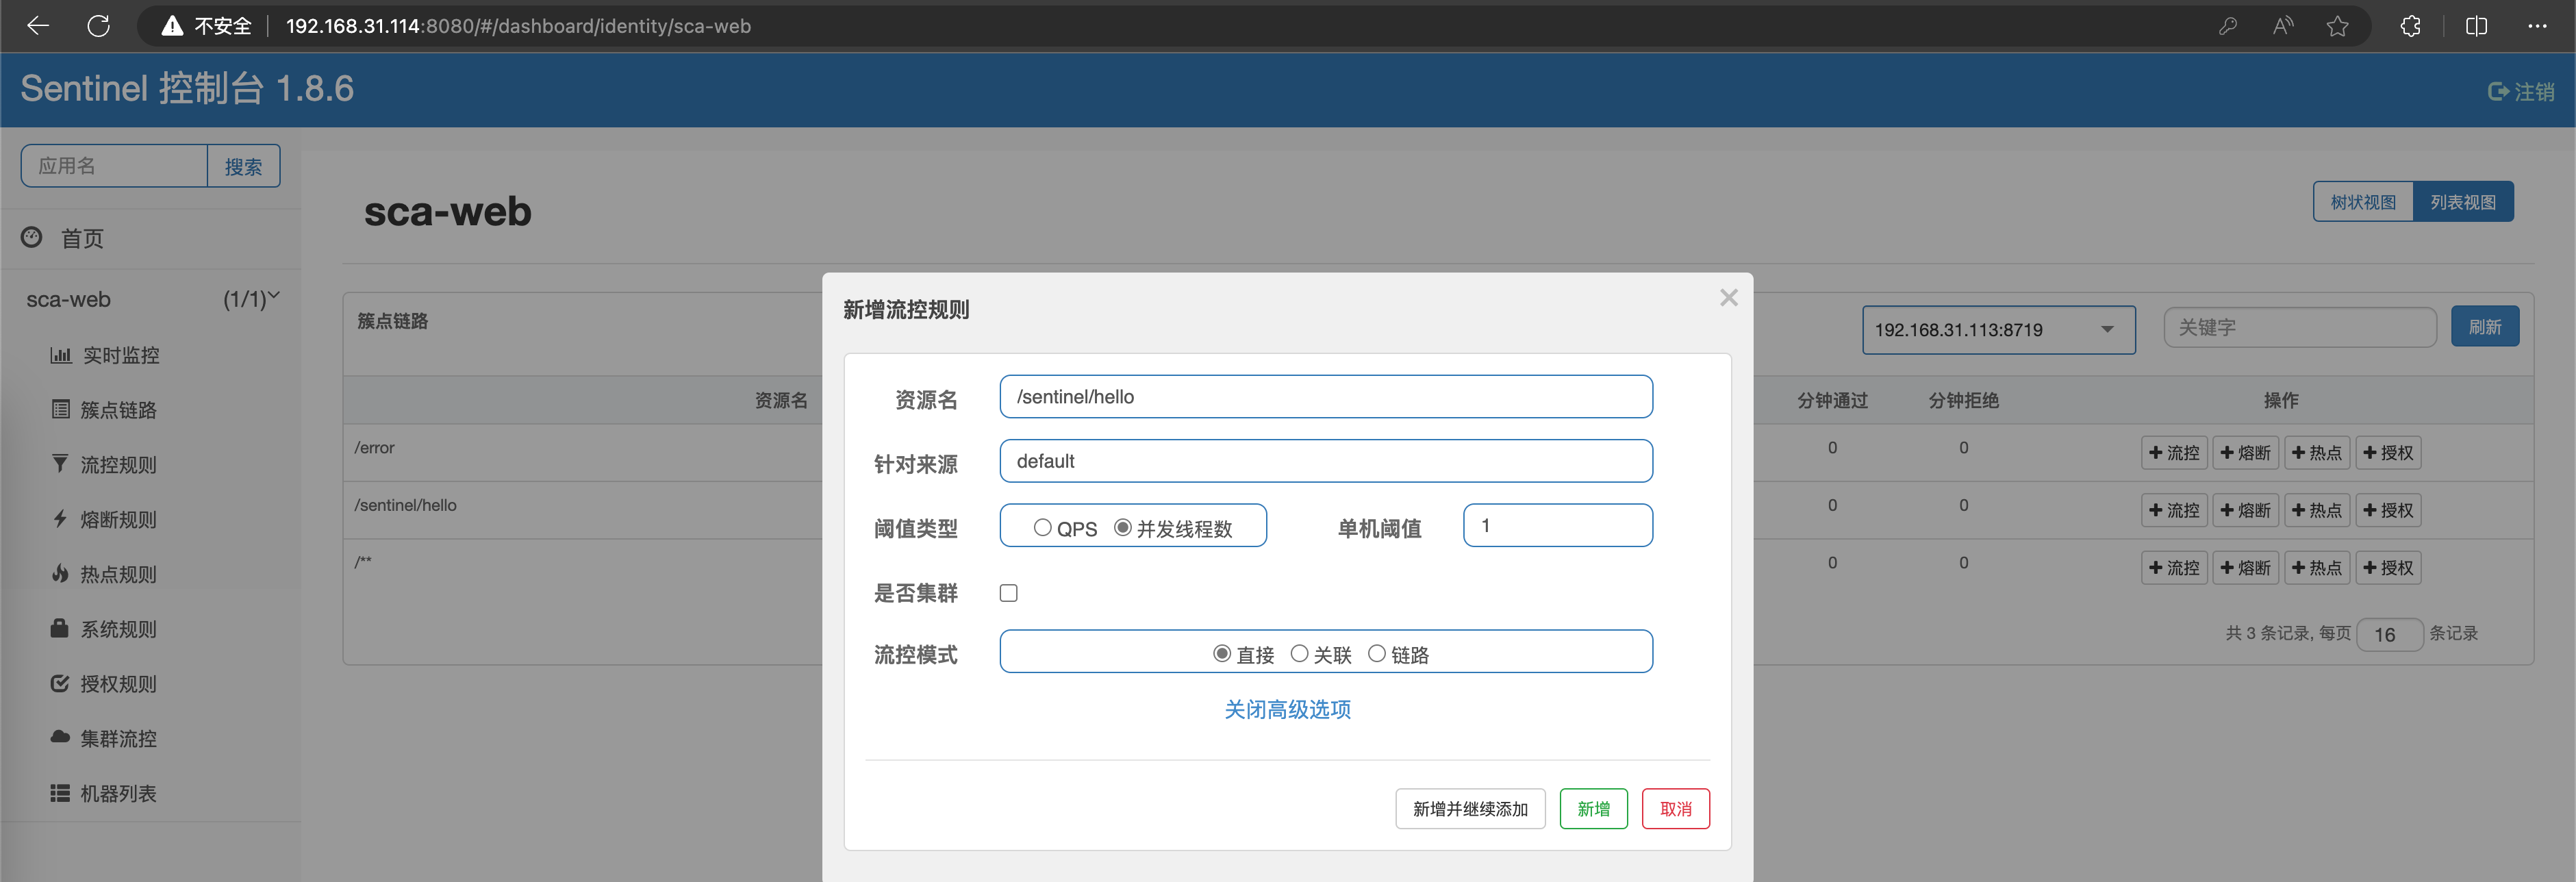
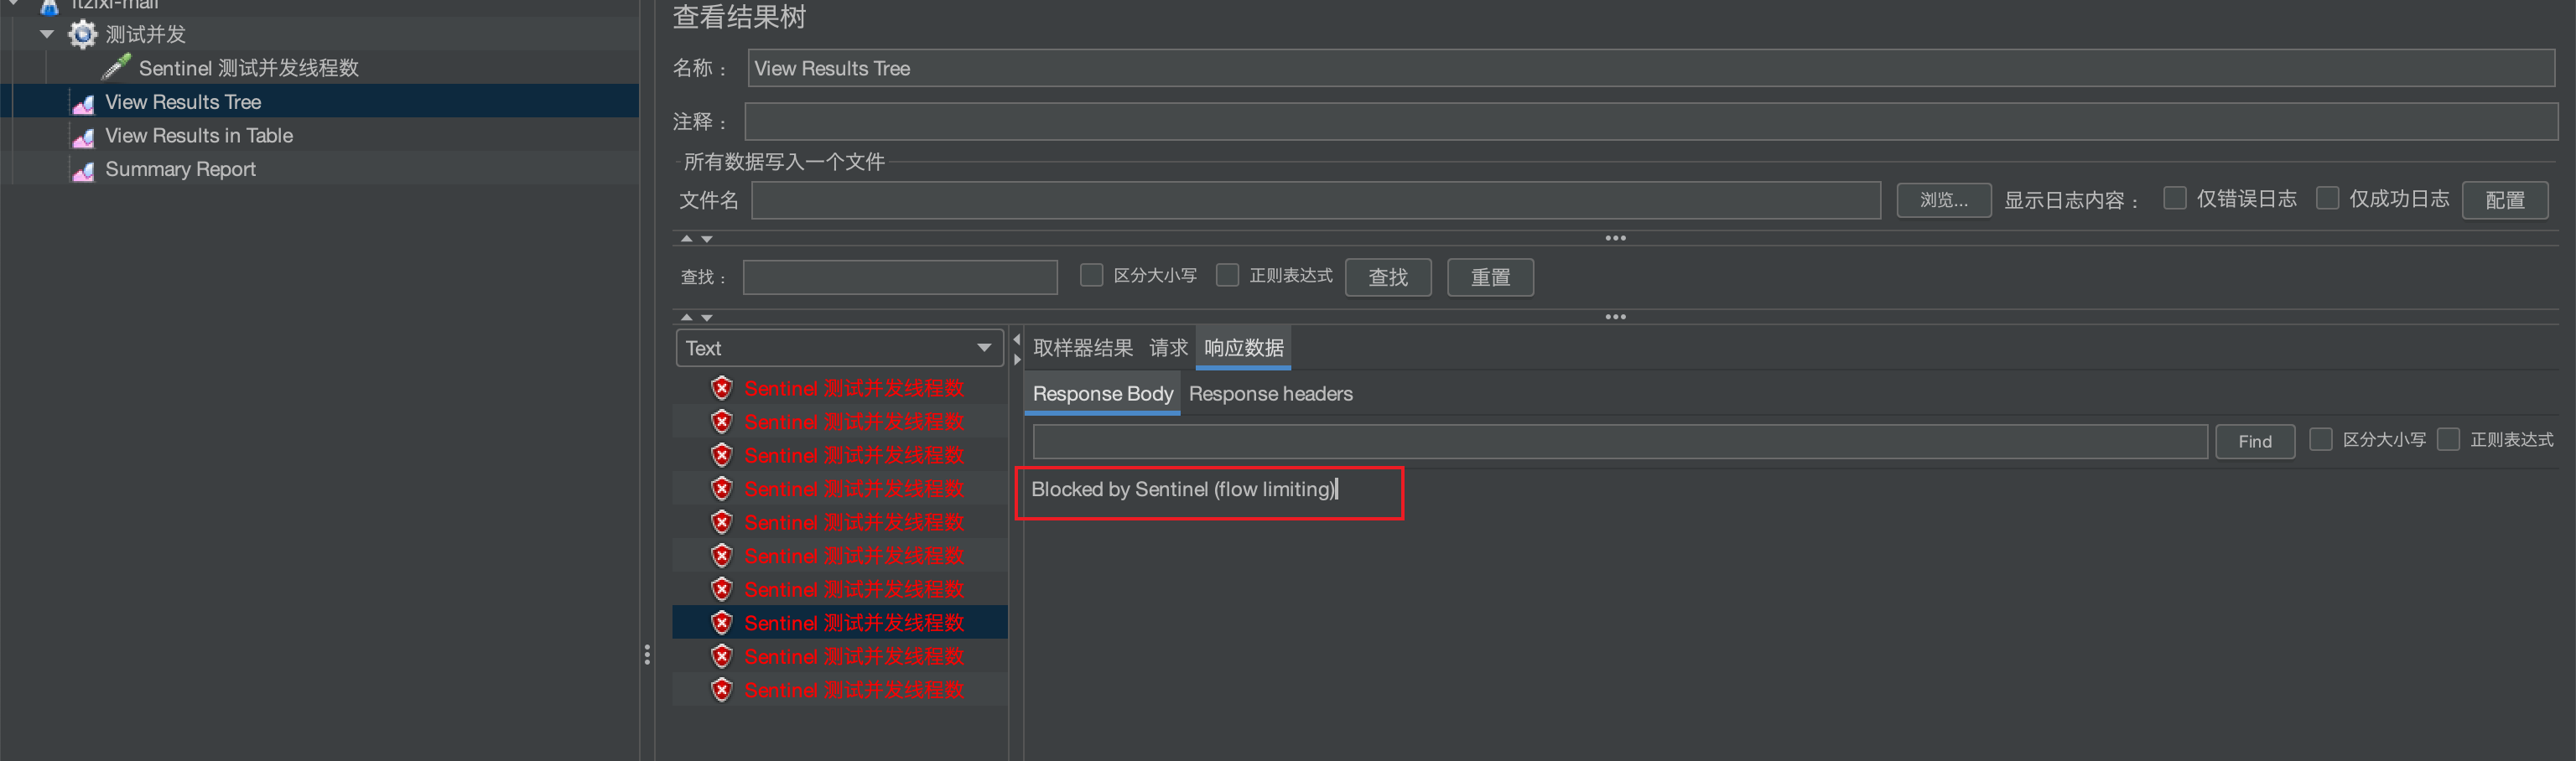
并发线程数类型限流。
为 /sentinel/hello 添加流控规则,限制并发线程数阈值为 1,然后多次请求接口。
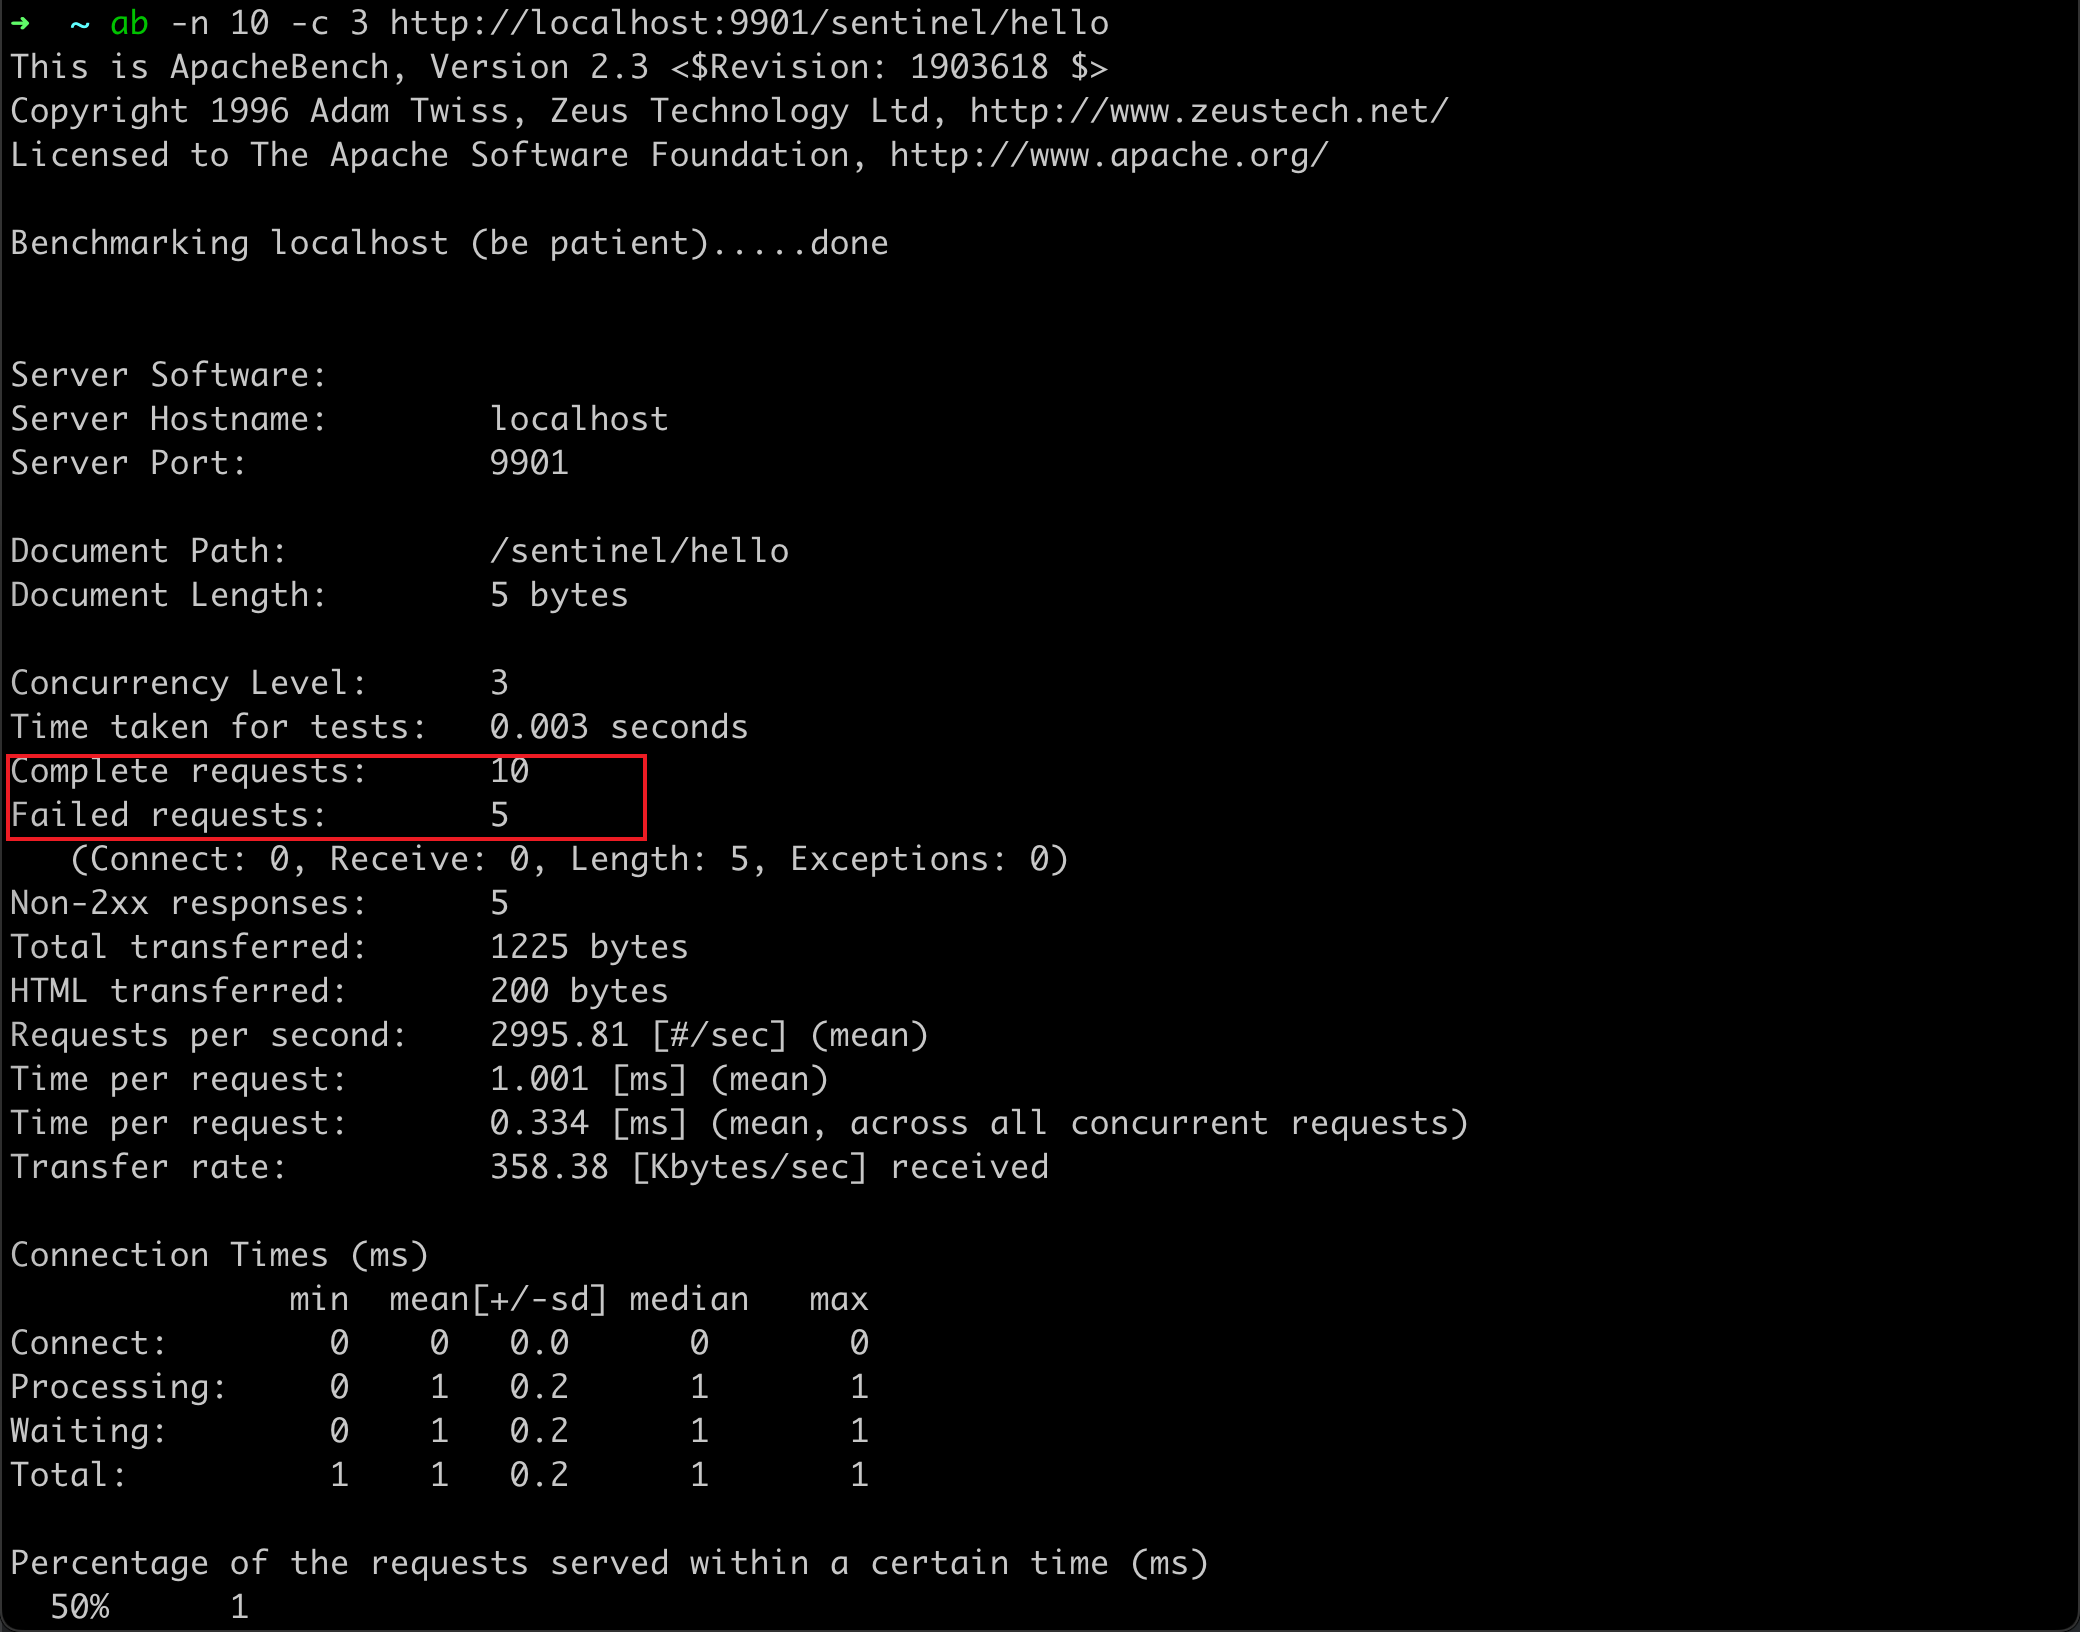
通过 ApacheBench 3 线程发送 10 个请求,可以发现有 5 个请求失败。
ab -n 10 -c 3 http://localhost:9901/sentinel/hello
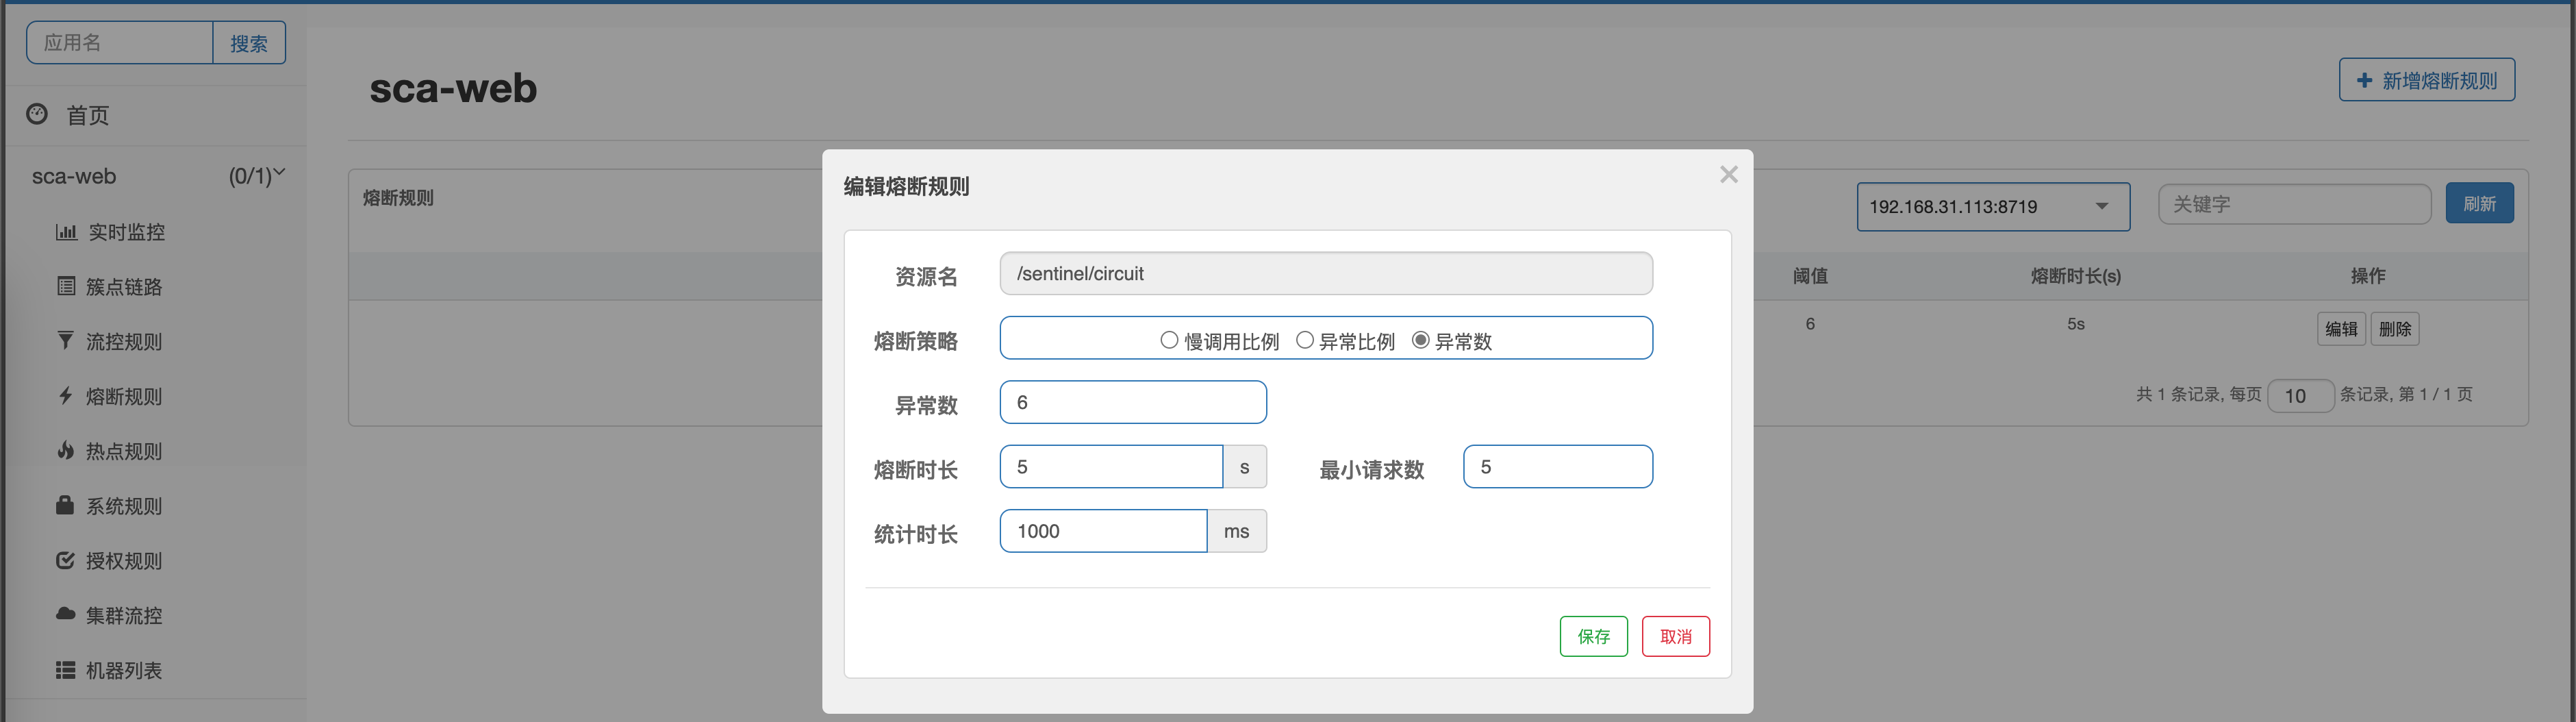
熔断策略
- 慢调用比例 (
SLOW_REQUEST_RATIO) - 异常比例 (
ERROR_RATIO) - 异常数 (
ERROR_COUNT)
以异常数 (ERROR_COUNT)为例,设置异常数超过 6 后自动进行熔断。
随后使用 jmeter 测试,结果如下。
Seata
https://seata.io/zh-cn/index.html
Seata 安装
从 https://github.com/seata/seata/releases 下载最新稳定版解压。
wget https://github.com/seata/seata/releases/download/v1.7.1/seata-server-1.7.1.zip
unzip seata-server-1.7.1.zip
server 端存储模式使用 file,配置和注册中心使用 nacos,修改配置文件 seata/confapplication.yml。
seata:
  # 配置中心使用 nacos
  config:
    type: nacos
    nacos:
      server-addr: 127.0.0.1:8848
      data-id: seata.properties
      group: SEATA_GROUP
  # 配置中心使用 nacos
  registry:
    type: nacos
    nacos:
      application: seata-server
      server-addr: 127.0.0.1:8848
      group: DEFAULT_GROUP
      cluster: default
  # 存储模式使用 file
  store:
    mode: file
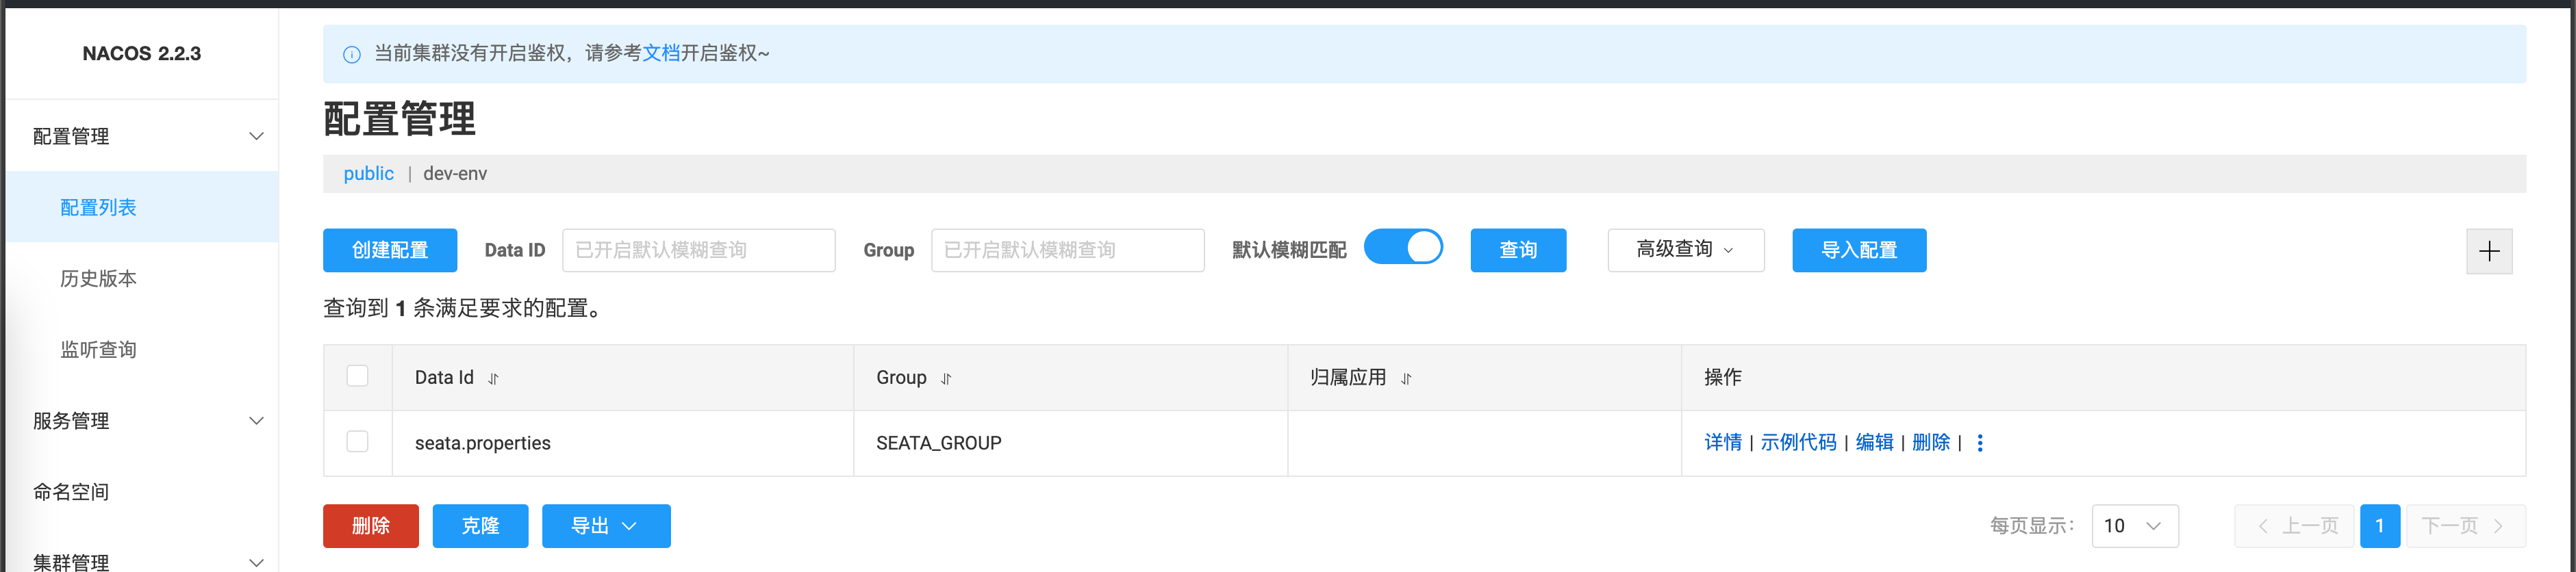
在 nacos 中创建配置 seata.properties,导入 https://github.com/seata/seata/blob/1.5.0/script/config-center/config.txt 内容。
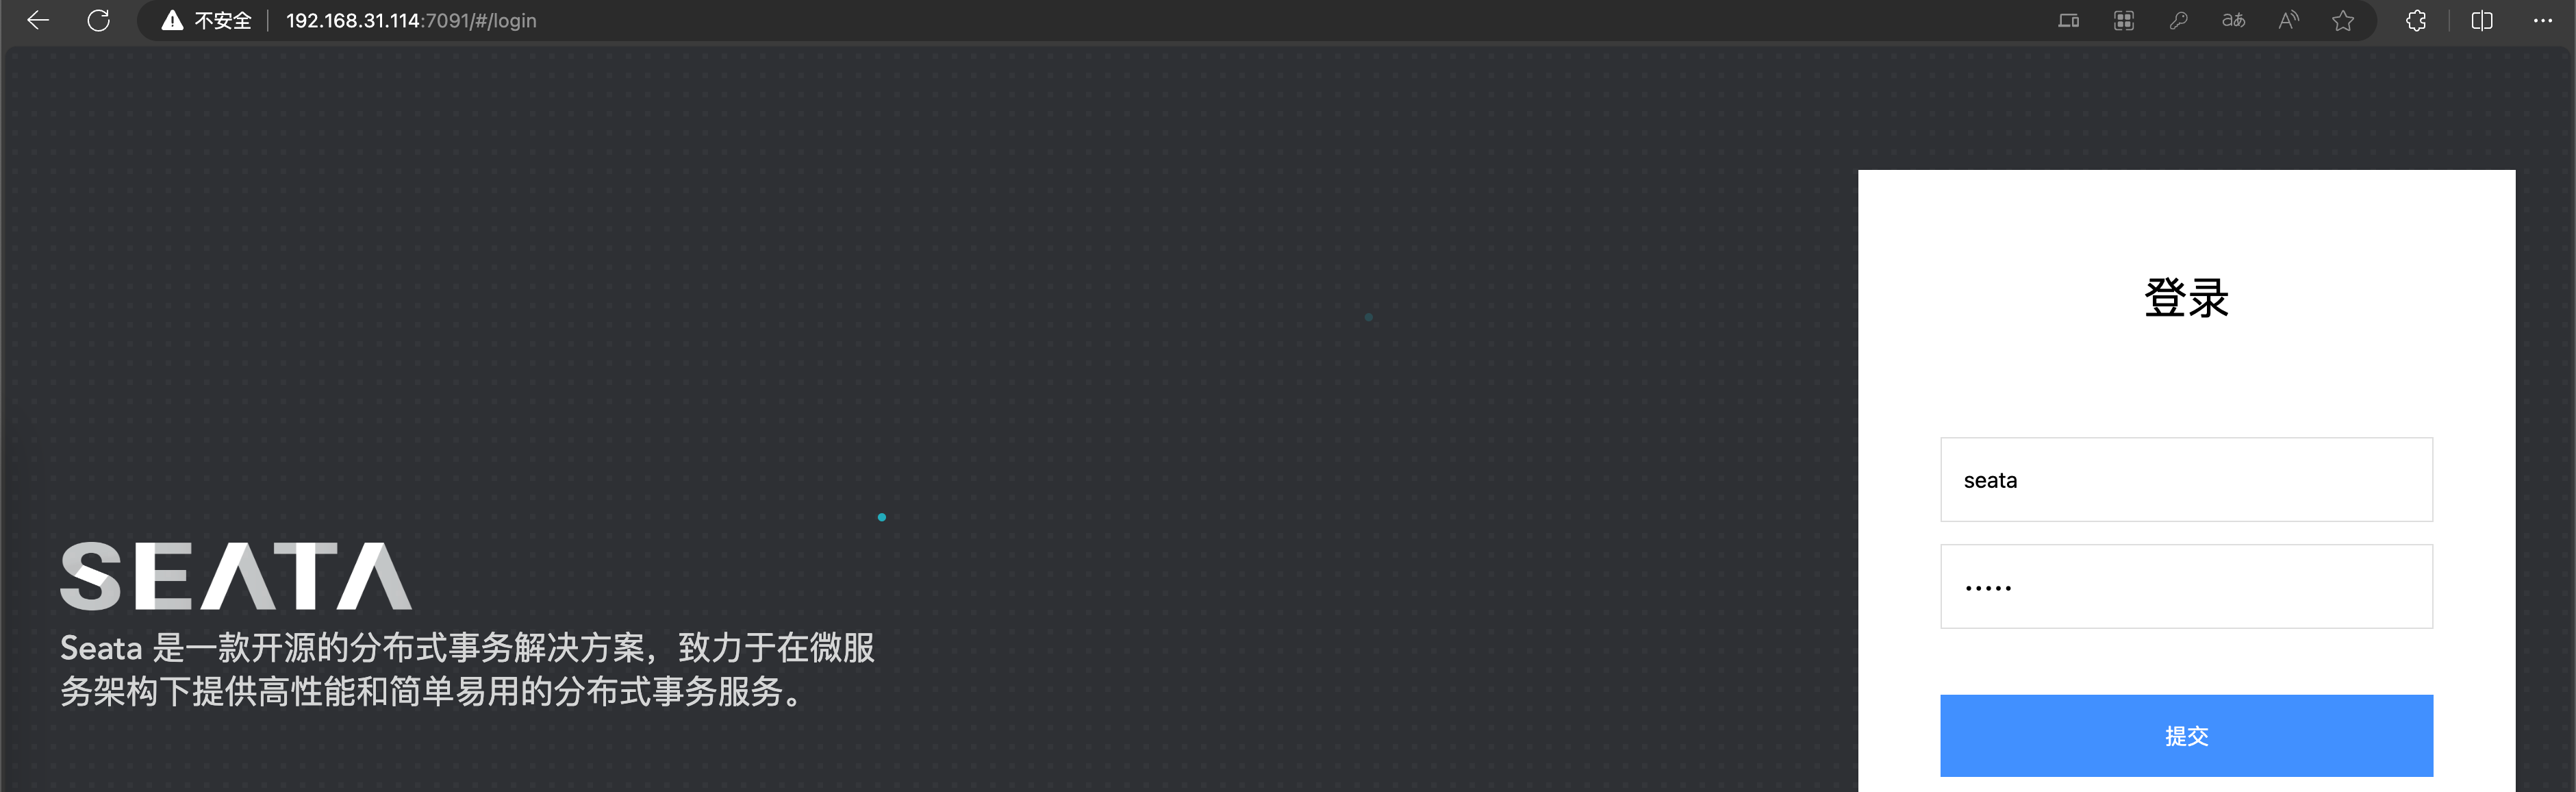
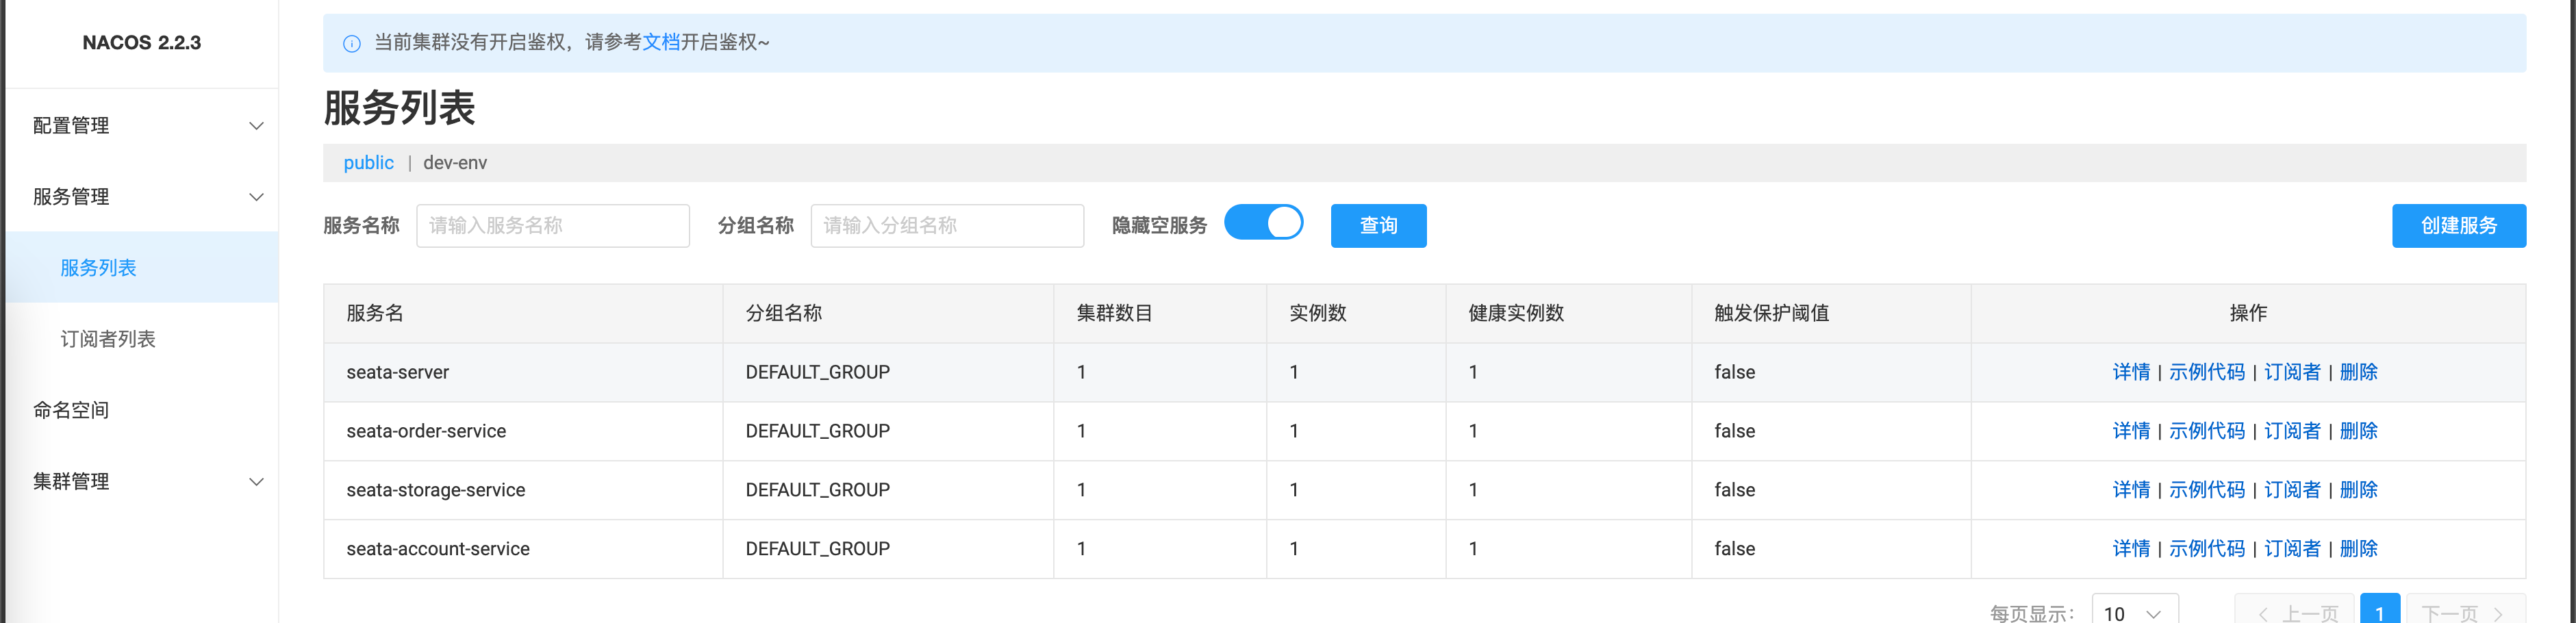
启动 seata,启动完成后即可打开控制台 http://192.168.31.114:7091/#/login,输入默认密码 seata / seata。
bash bin/seata-server.sh
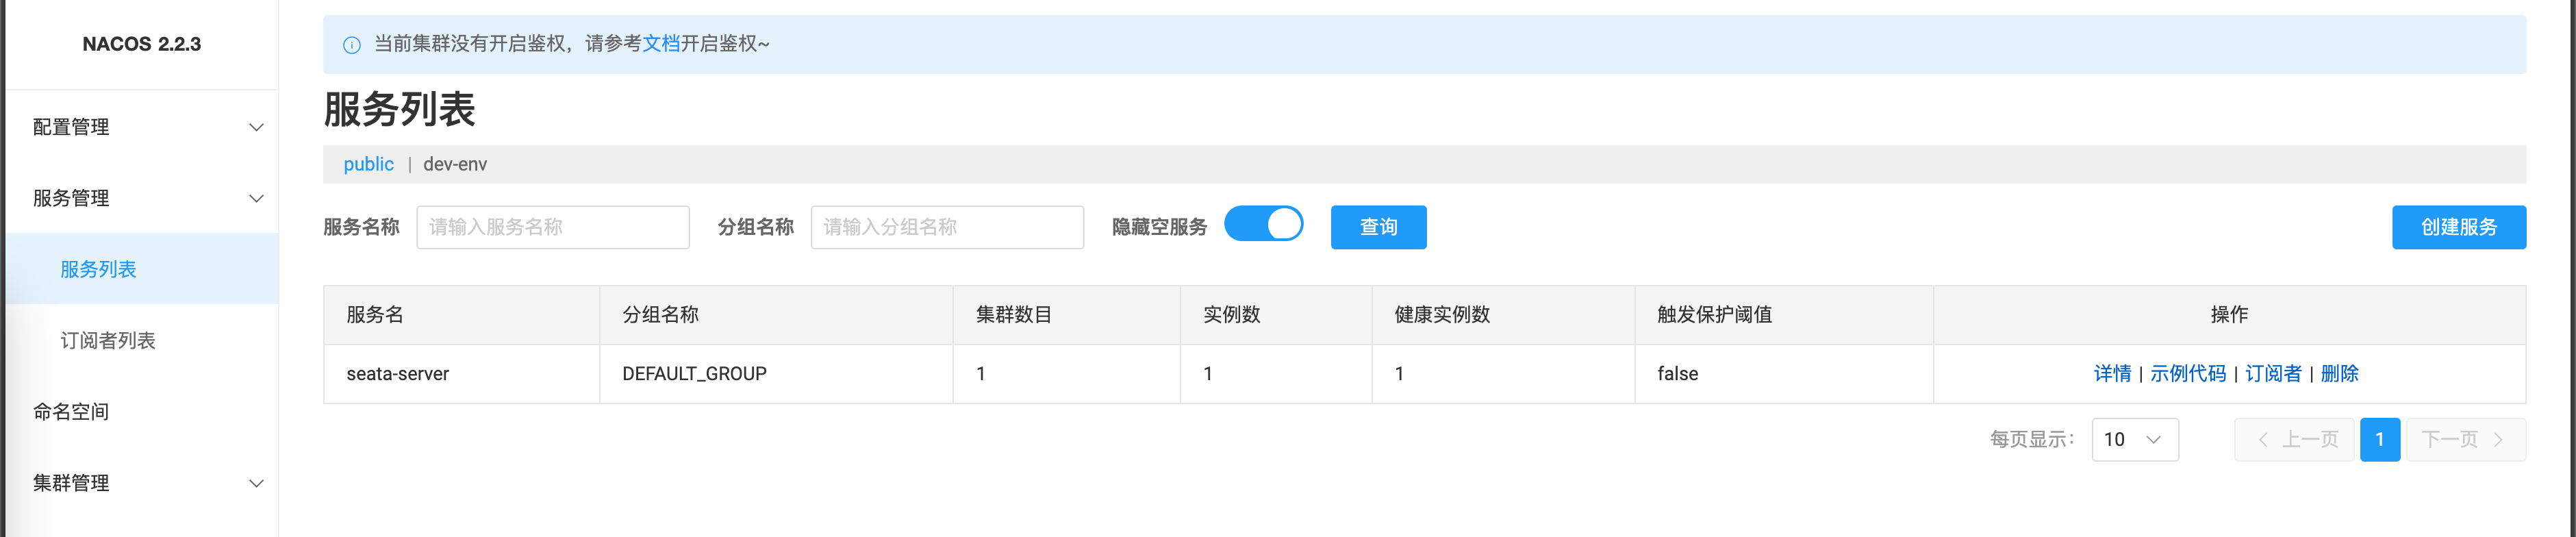
同时可发现 seata-server 已注册到 nacos 中。
AT 模式演示
参考 Seata Example。
为复用配置,创建 seata-base 项目。
在 build.gradle.kts 中引用公共依赖。
plugins {
    id("multi.sca.java-library-conventions")
}

dependencies {
    api("com.alibaba.cloud:spring-cloud-starter-alibaba-seata")
    api("com.alibaba.cloud:spring-cloud-starter-alibaba-nacos-config")
    api("org.springframework.boot:spring-boot-starter-jdbc")
    api("com.mysql:mysql-connector-j:8.1.0")
}
在 application-base.yml 中配置公共属性。
spring:
  cloud:
    nacos:
      discovery:
        server-addr: 192.168.31.114:8848
      config:
        server-addr: 192.168.31.114:8848
        group: SEATA_GROUP
  config:
    import:
      - nacos:seata.properties?refresh=true
  main:
    allow-bean-definition-overriding: true
  datasource:
    name: storageDataSource
    driver-class-name: com.mysql.cj.jdbc.Driver
    url: jdbc:mysql://192.168.31.114:3306/sca?useSSL=false&serverTimezone=UTC
    username: root
    password: 950915

seata:
  enabled: true
  application-id: ${spring.application.name}
  # 和 seata.properties 中 service.vgroupMapping.default_tx_group=default 对应
  tx-service-group: default_tx_group
  config:
    type: nacos
    nacos:
      server-addr: 192.168.31.114:8848
  registry:
    type: nacos
    nacos:
      server-addr: 192.168.31.114:8848
其中 seata.properties 为 Seata 安装过程中创建的配置,sca 数据库表见 https://github.com/alibaba/spring-cloud-alibaba/blob/2022.x/spring-cloud-alibaba-examples/seata-example/all.sql。
以 account-server 项目为例,引入依赖和配置。
在 build.gradle.kts 中引入 seata-base 。
plugins {
    id("multi.sca.java-common-conventions")
}

dependencies {
    implementation(project(":seata:seata-base"))
}
在 application.yml 中引入 application-base.yml 中定义的公共属性。
server:
  port: 18084

spring:
  profiles:
    include: base
  application:
    name: seata-account-service
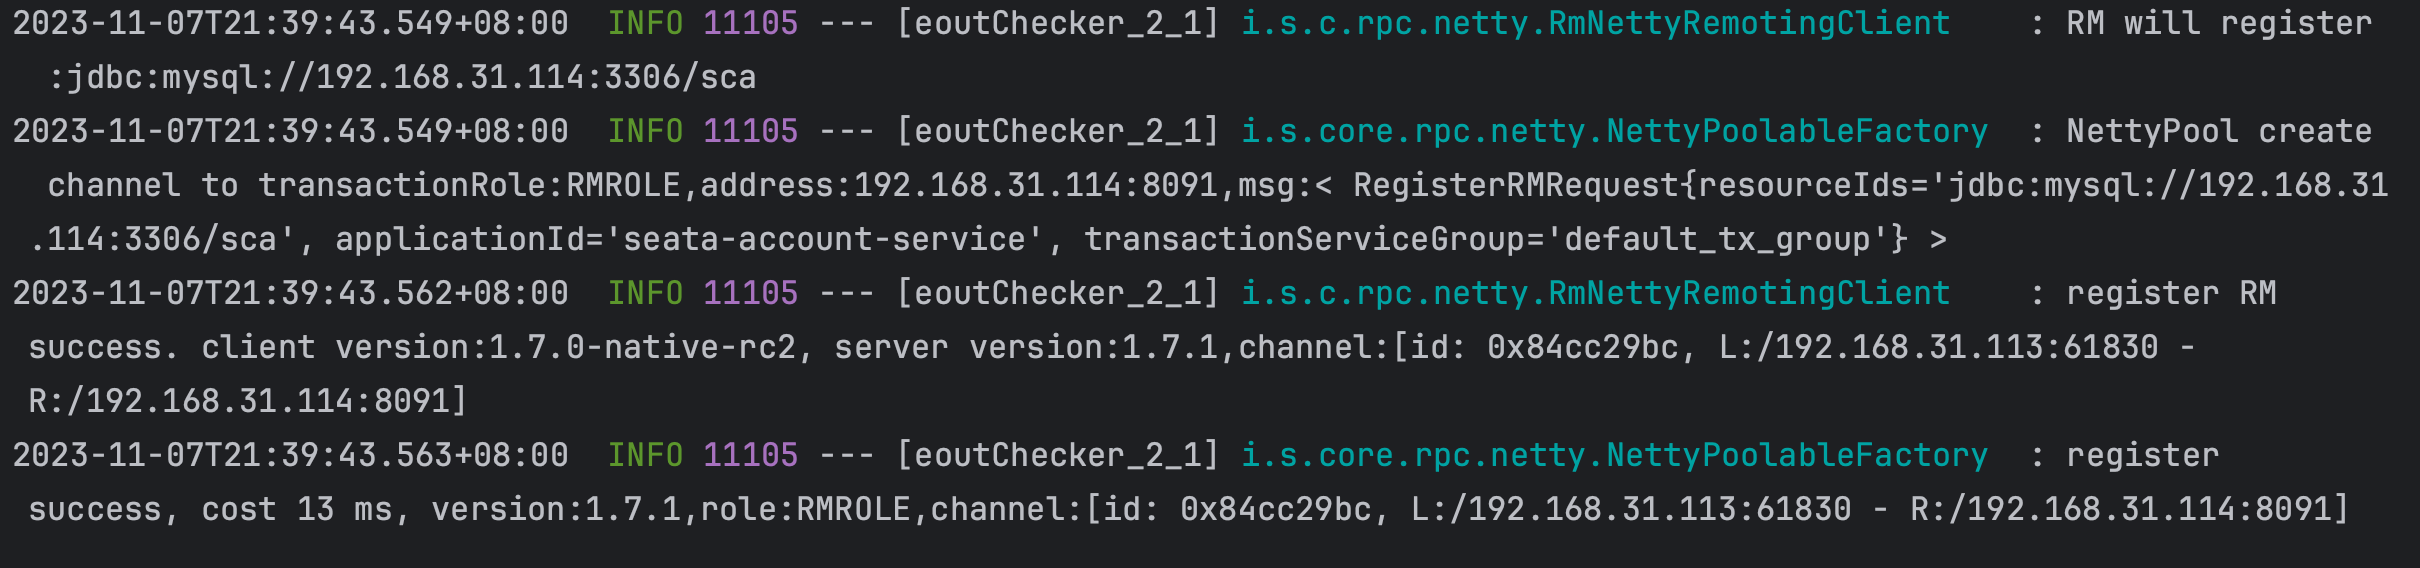
随后启动四个项目,可在控制台查看到已注册的服务。
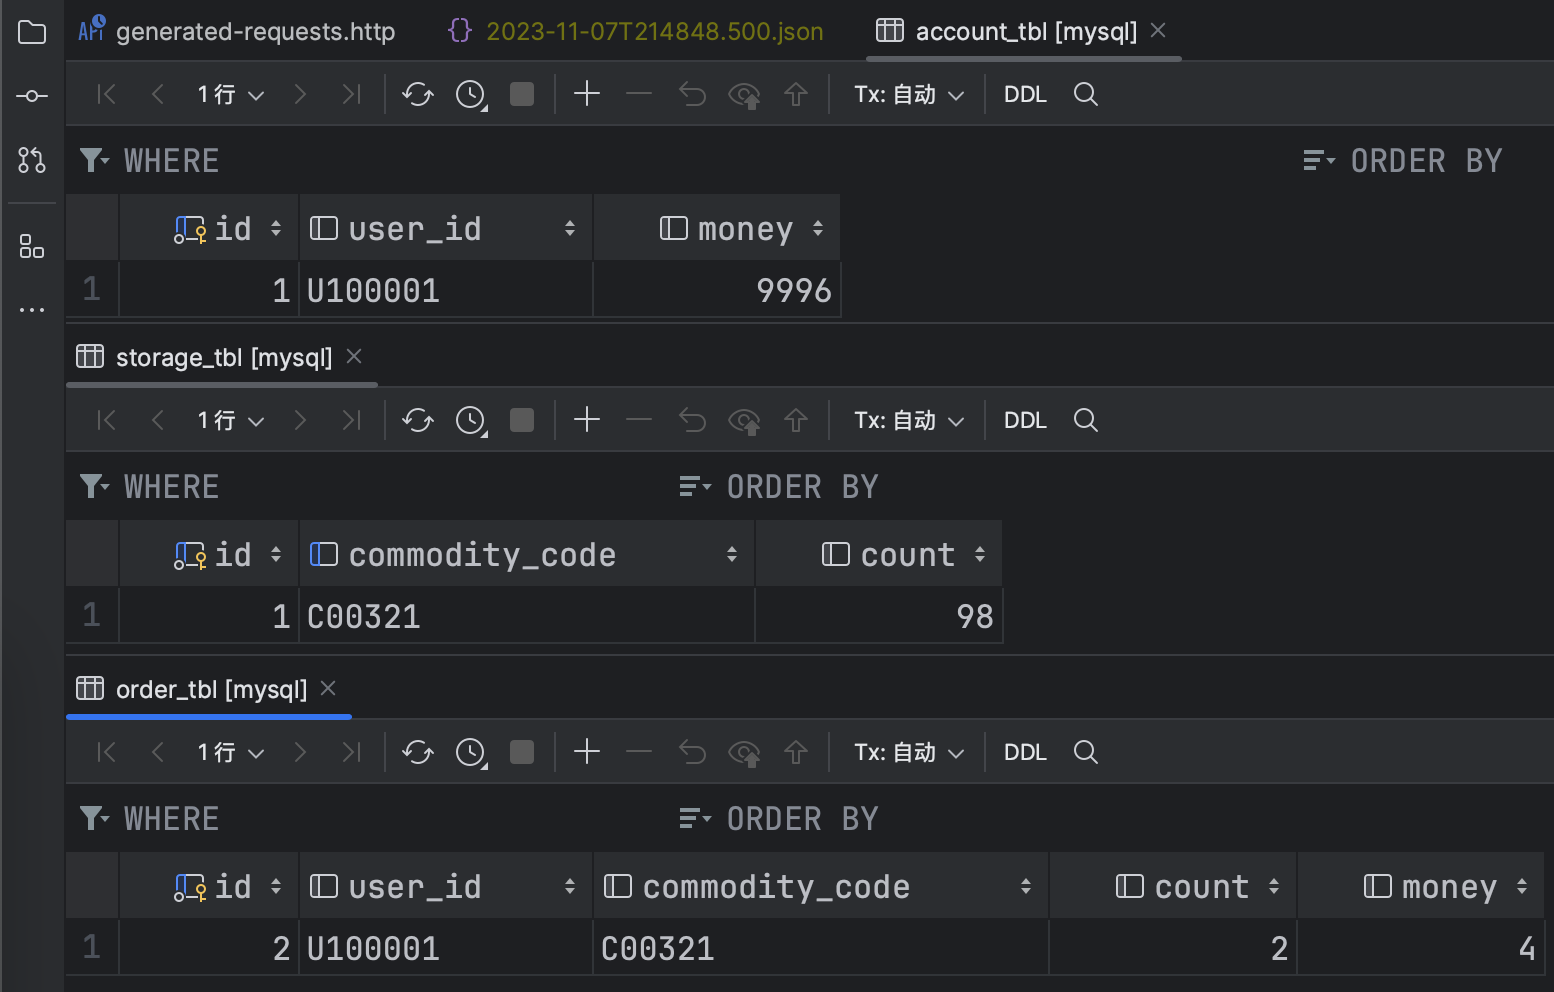
使用 http://localhost:18081/seata/feign 测试,当接口异常时,account_tbl 和 storage_tbl 表中数据不变,当接口正常时,三张表数据满足一致性。
两个问题
seata-server 和业务服务注册的命名空间和分组要一致,不然会出现 no available service found in cluster 'default' 错误。

seata-server 和业务侧跨网络时启动 seata-server 时需要指定 IP,即 -h 192.168.31.114,不然会出现 0101 can not connect to xxx 错误。